This blog post shows how to deploy a Netlify e-commerce site. The site uses Netlify functions and Stripe payment system. To ensure the site works, we will run a full end-to-end Cypress test after each deploy by triggering a GitHub workflow.
Repo
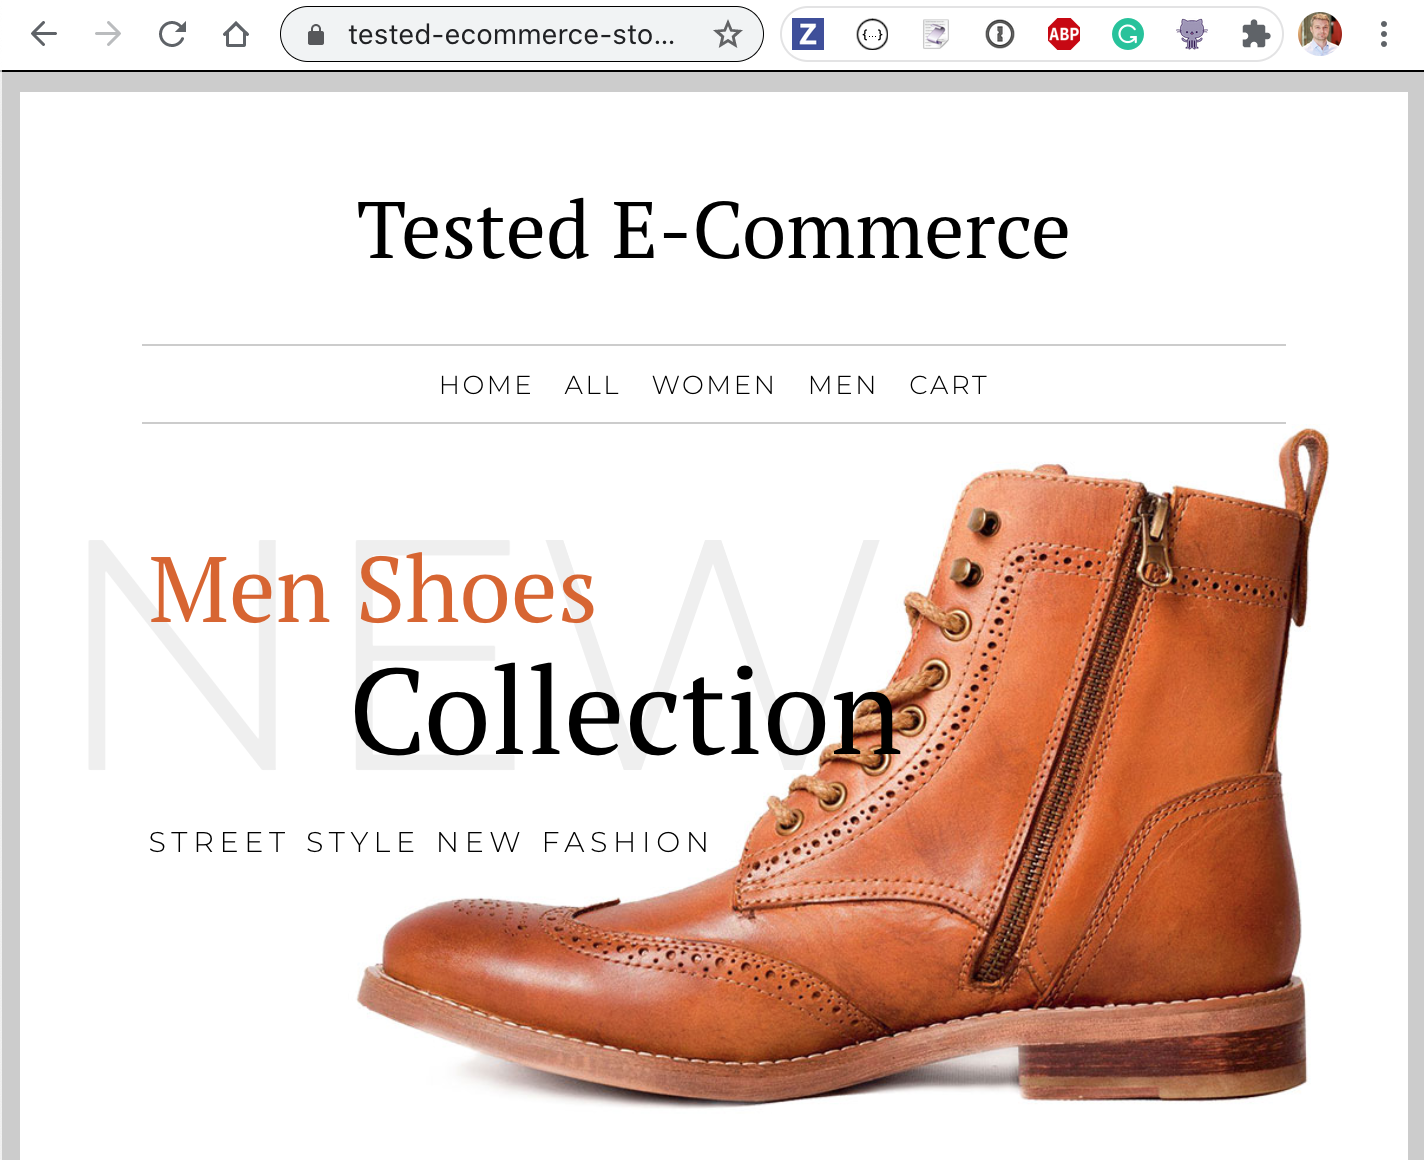
I have cloned a simple e-commerce site sdras/ecommerce-netlify to bahmutov/ecommerce-netlify and set up deploying to Netlify. You can find the site at tested-ecommerce-store.netlify.app and its deploy logs at Netlify. In this blog post I will show how to write a simple end-to-end test for the site. The test should run after each preview and production deploy to make sure the site's customer can actually buy items from the online store.
Or at least pretend they do - the site does no-op after the Stripe payment.
The interesting part is triggering the CI build after Netlify deploys the site. Instead of testing on Netlify via netlify-plugin-cypress build plugin, we are going to trigger our GitHub Actions workflow by using the netlify-plugin-github-dispatch. Running the tests on GitHub Actions allows us to run multiple test jobs in parallel, use Chrome or Firefox browser, and run tests on every major operating system. The Netlify Build is still limited to a single container and, compared to GitHub Actions, is more expensive.
End-to-end test
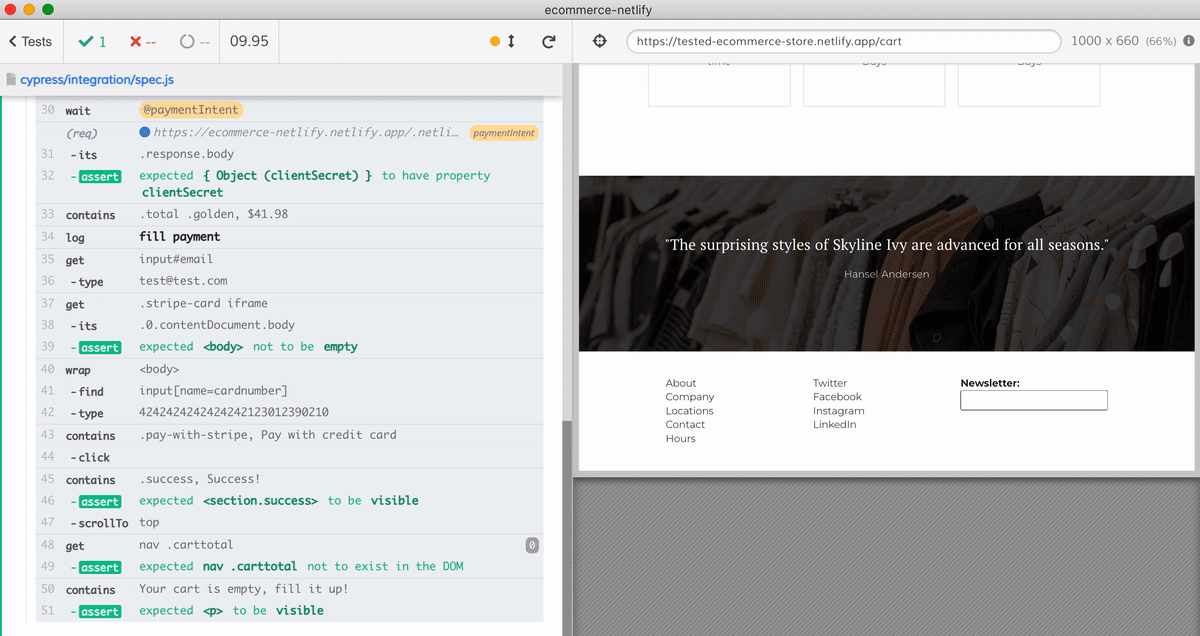
I will install Cypress and write a few basic tests. The most important test goes through the entire workflow: selects a few items, goes to the cart page, enters the credit card number, and ends up on the "thank you for your order" page. In this blog post I am using Cypress v6.5.0.
1 | /// <reference types="cypress" /> |
The test runs for 10 seconds - most of it waiting for the cart to reset to empty after the successful purchase.
Let's run this test on CI.
Tip: I am skipping writing more tests in favor of showing the entire testing setup in this blog post. But one thing I would add is going through the same test with mobile viewport to make sure the site works for users using smaller screens. See Use meaningful smoke tests for example. I would also immediately add a few visual tests. A full page screenshot at each major step along the customer journey would ensure we do not accidentally deploy a site with layout or styles problems.
Deploying to Netlify
We will build the static site and deploy using Netlify Build process. Since we are NOT going to run Cypress on Netlify, there is no point in installing it. We can set skip installing by setting the CYPRESS_INSTALL_BINARY=0 environment variable under the "Deploy Settings" on Netlify or in our netlify.toml file.
The dispatch plugin
At the end of the deploy we will trigger a GitHub Actions workflow in this repository, allowing the Workflow to install Cypress and run E2E tests against the deployed URL. To trigger the GitHub workflow we need to use the Netlify Build plugin netlify-plugin-github-dispatch
1 | yarn add -D netlify-plugin-github-dispatch |
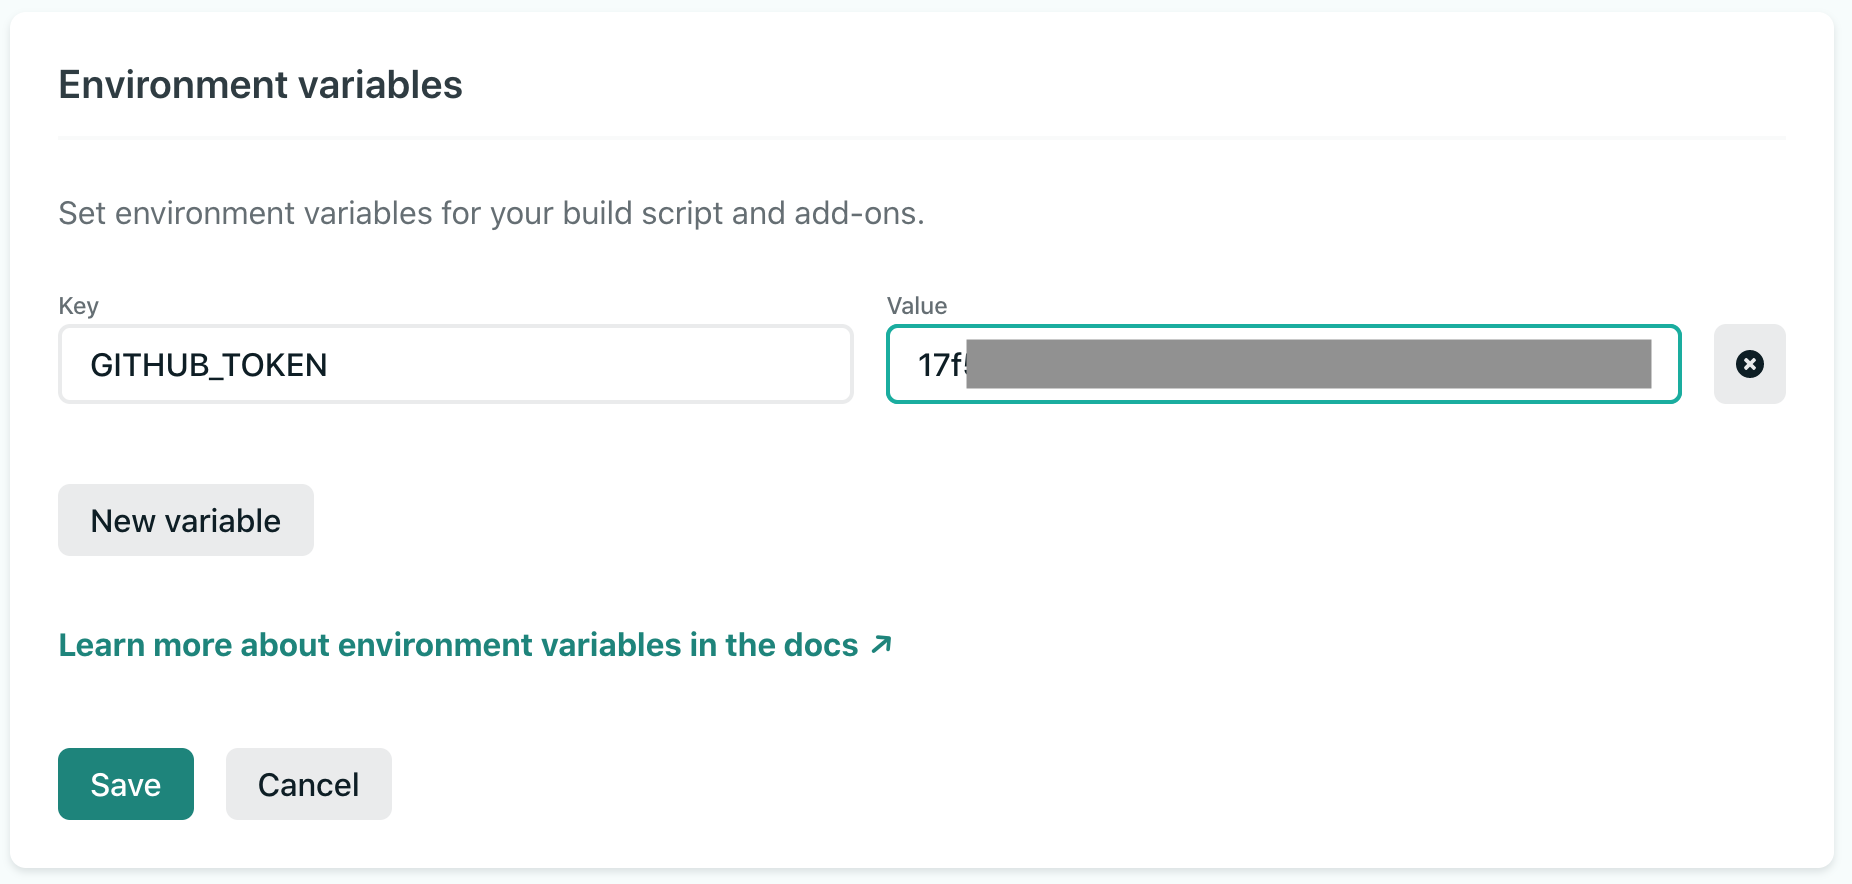
We need to create a GitHub token with "repo" permissions so that the plugin can create the new workflow run. Keep this token secret and set it as environment variable GITHUB_TOKEN under Netlify build settings "Environment"
And then add the plugin to the netlify.toml file. Here is our project's netlify.toml file.
1 | [build] |
We have provided the inputs object with configuration. We basically just pointed back at the repository. But here it a pro tip: we could have triggered a GitHub Actions workflow in any repository at the end of the Netlify deploy, as long as we have the right permissions! Thus our end-to-end tests could reside in a separate repository from our web application. I personally prefer to keep the tests and the app in the same repository; it helps keep them in sync.
The workflow
We need a workflow to trigger at the end of the Netlify deploy. GitHub workflows can be triggered by different events, push and pull_request being the most common. We will use workflow_dispatch, which is a special event that can easily be triggered by the outside services or even manually.
We should create the workflow using the same relative path as entered in the dispatch inputs, in our case it will be file .github/workflows/e2e.yml.
Notice how we set up the workflow_dispatch inputs - we need to receive the deployPrimeUrl parameter - that's the Netlify URL our plugin will send. A good tip is to print it later to make it obvious in the CI logs using echo "Testing url ${{ github.event.inputs.deployPrimeUrl }}" command.
1 | # test the deployed Netlify site |
We are using the Cypress GitHub Action to install, cache, and execute Cypress. The only thing we need to configure is the baseUrl option to point at the deploy URL.
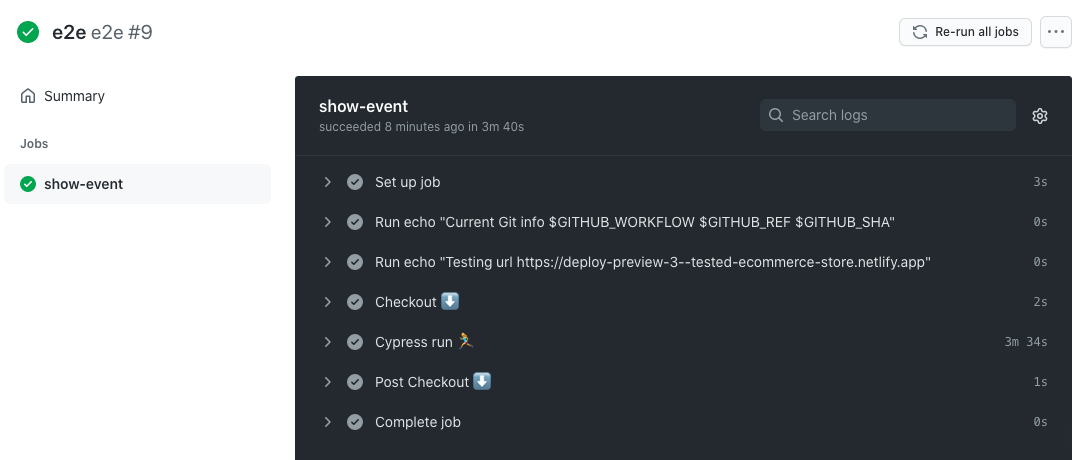
Great! The tests have passed, the preview deploy is working.
Record to Cypress Dashboard
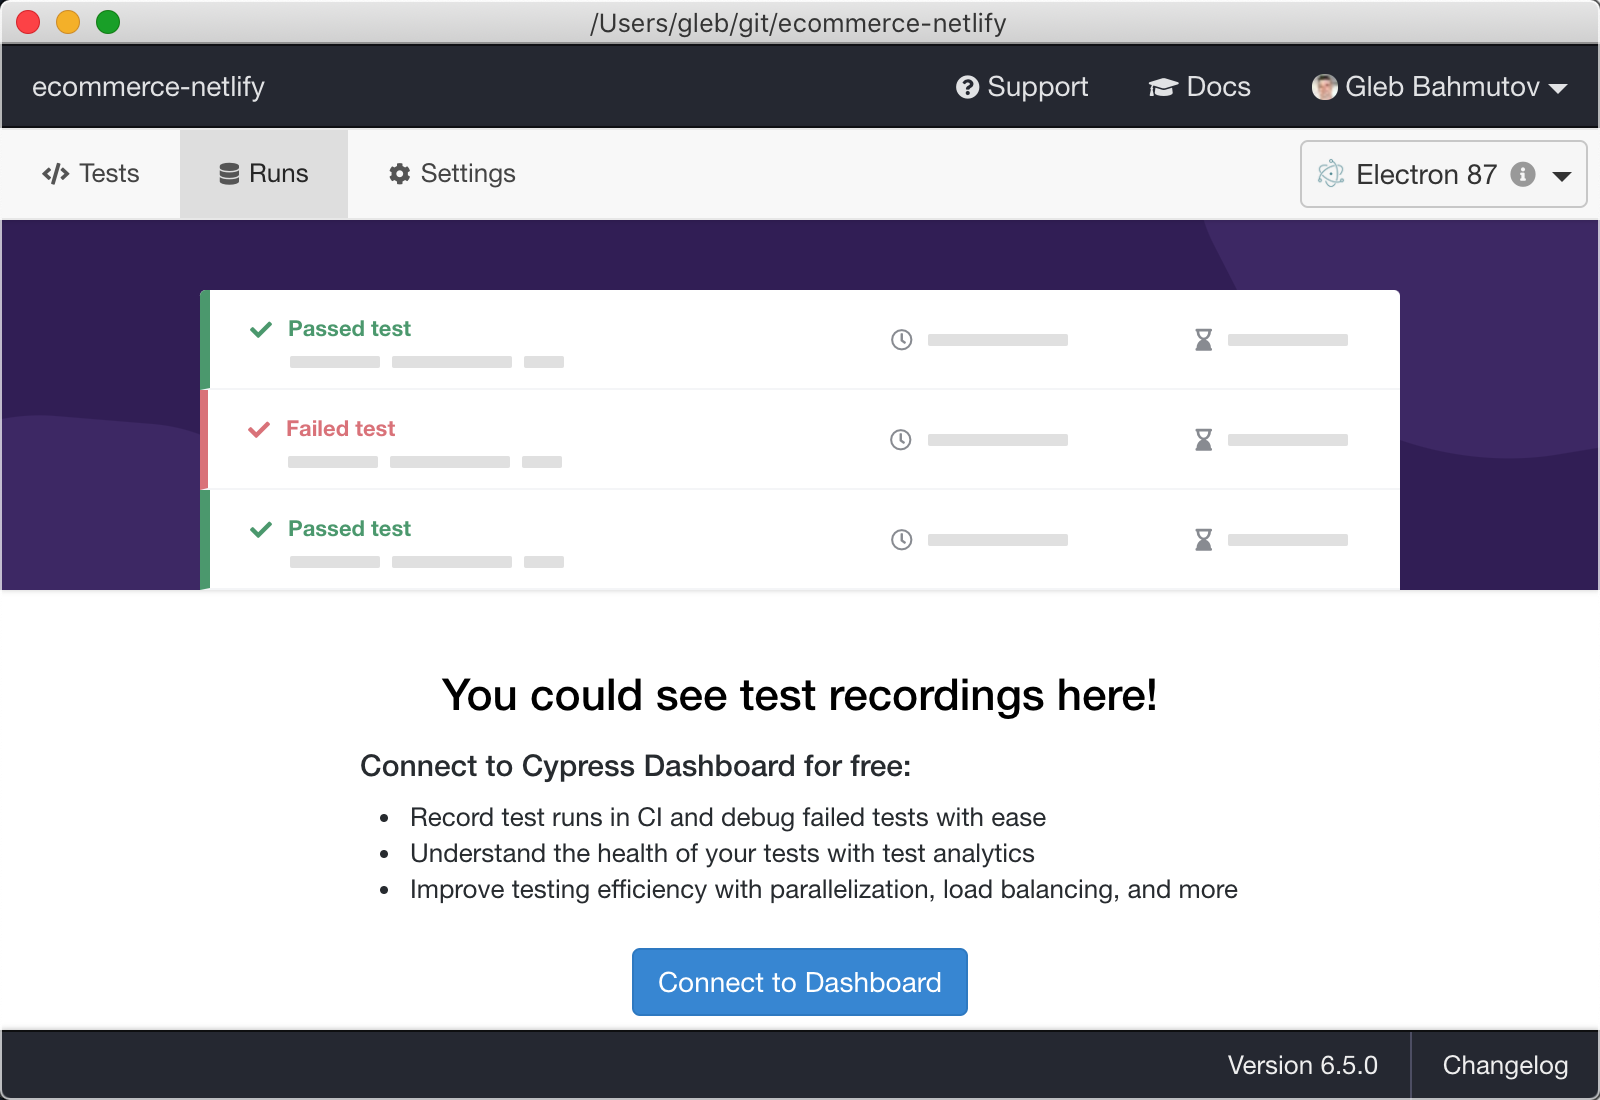
How does our site look during testing? What happens if a test fails? The simplest way to find out is to record the test results to Cypress Dashboard. From Cypress running locally, click the "Runs" tab.
Follow the steps and store the created private recording key under the repository's secrets.
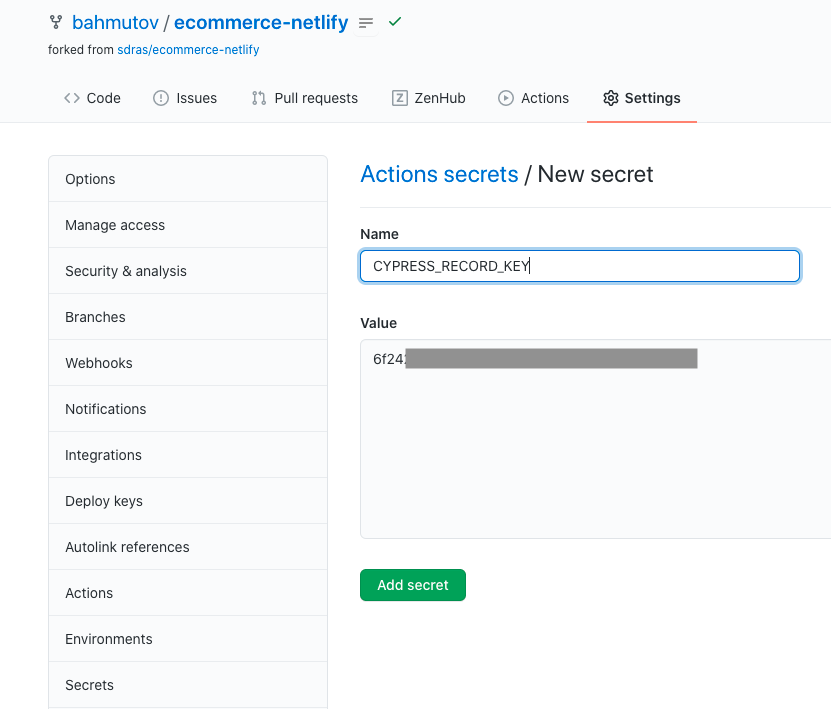
Tip: I keep it simple and use the same name for the secret as for the environment variable.
Now let's modify our workflow file to tell Cypress to record the test results to Cypress Dashboard.
1 | # test the deployed site using |
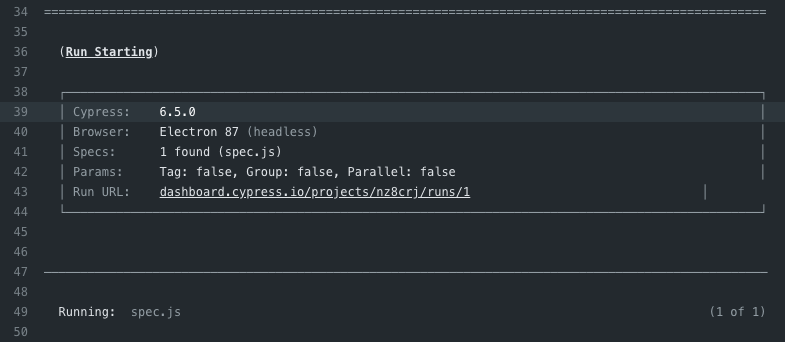
Let's open a pull request and we should see the Dashboard run URL in the Cypress output
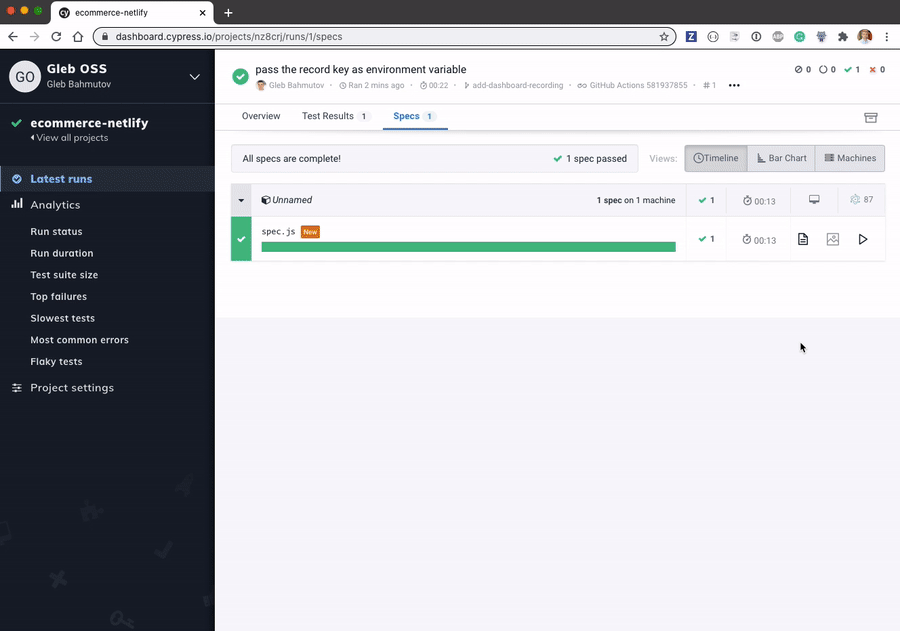
We can go the Dashboard and see the test results, view the video of the run, etc.
You can see the recorded test results yourself by clicking on this badge
Status check
Notice that our pull request does not show the E2E workflow's status amongst the checks. Only the Netlify checks are present.
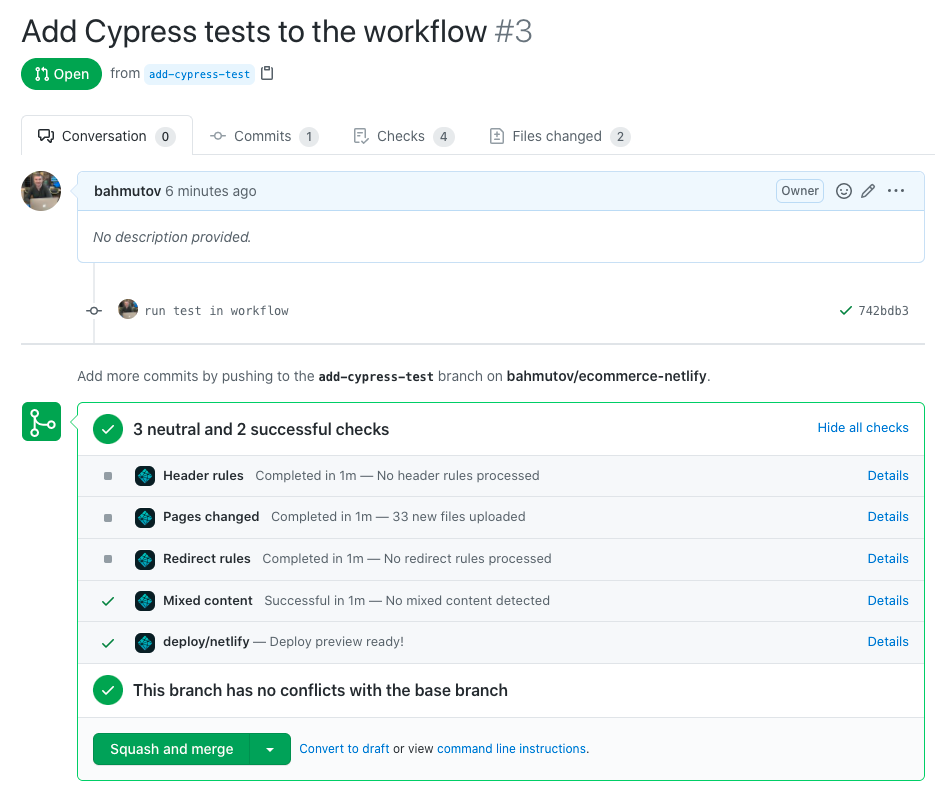
This is because we do not associate the triggered workflow with the pull request. The best way I know to comment on the pull request with test status is Cypress GitHub Integration app. And I am not saying this just because I work at Cypress - no, it really makes sense to just flip the switch.
Scroll in the Cypress Dashboard project settings to "GitHub Integration"
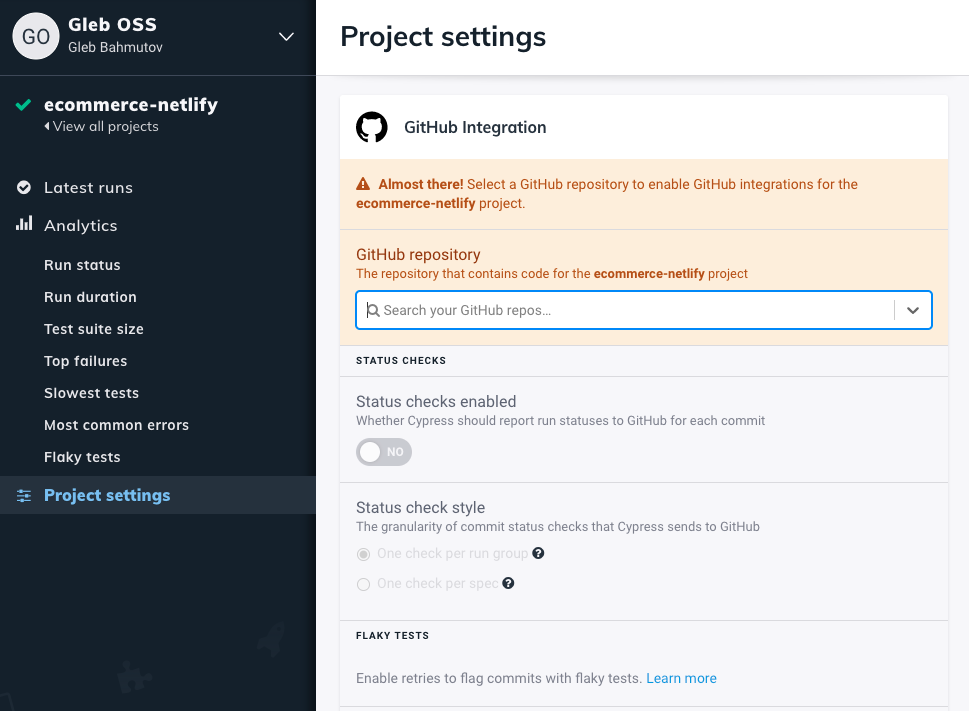
Pick the repo from the dropdown list. If the repo is not listed, you need to adjust the Cypress GitHub App's permissions under your GitHub settings and allow the app to access the repository.
After selecting the "bahmutov/ecommerce-netlify" repository, I flip the switch.
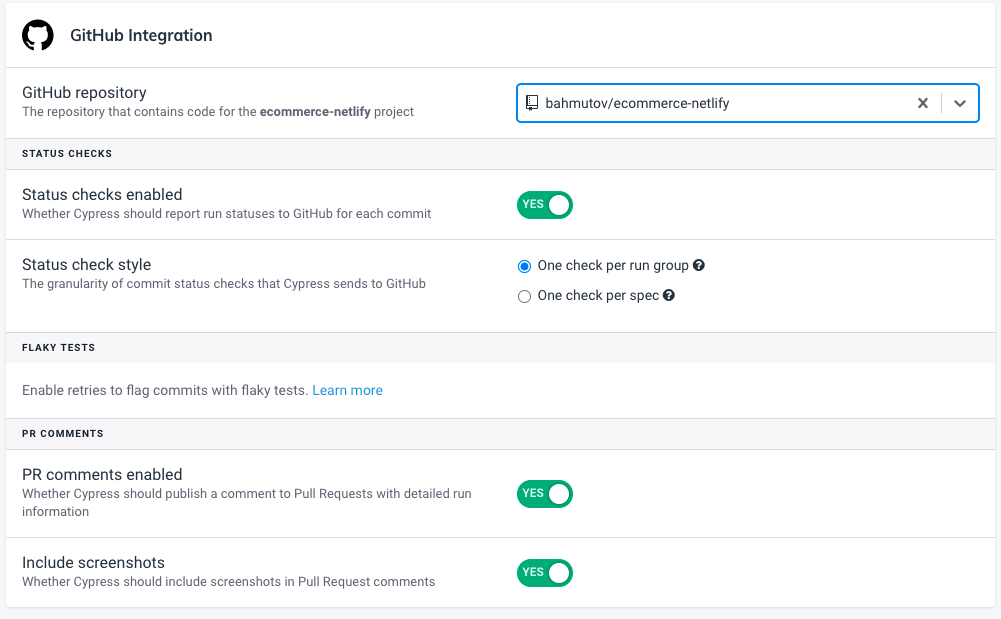
Tip: Cypress Dashboard has GitLab and Bitbucket integrations too!
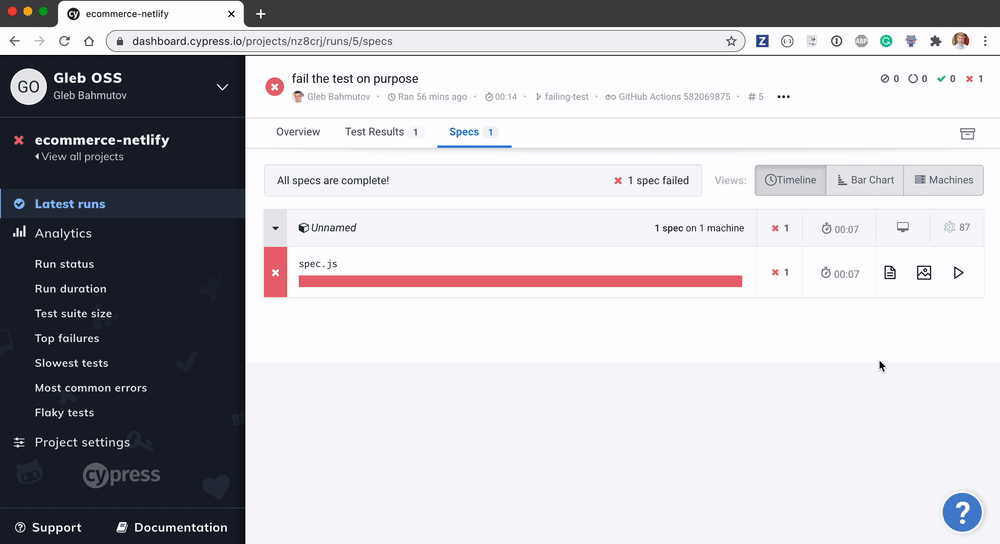
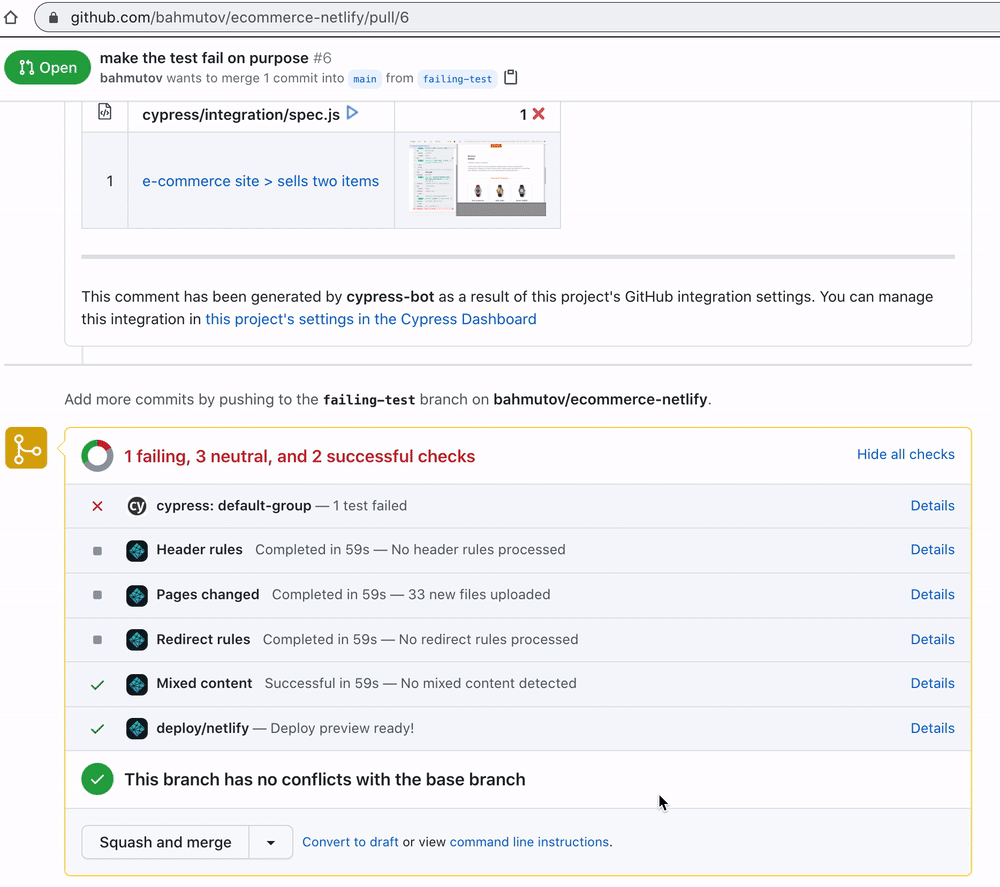
Let's test the integration. Let's open a pull request with a failing test. Netlify deploys the site, and GitHub workflow fails. We can see why in the test results on the Dashboard, plus there is the screenshot at the moment of failure, and the video of the tet run.
Now let's go back to the pull request. Notice the red Cypress status check - this pull request should not be merged! The Cypress integration also comments on the pull request. The comment has the error and even the error screenshot thumbnail.
By running a battery of end-to-end tests we can ensure that every pull request is works, and we are not merging code that would break the production site for our users.
Parallel tests
If our test set grows, running all tests on a single machine starts to take too long. In that case, we can easily parallelize the tests across multiple GitHub machines. Read the Cypress GH Action documentation and my blog post Split Long GitHub Action Workflow Into Parallel Cypress Jobs. With all we have done so far, running the job in parallel should be easy.