Note: you can find the example source code in repo bahmutov/percy-for-cli-example.
I have been a big fan of visual testing for web applications. Since reliable rendering of web pages and comparing images is complicated, I am a big fan of just using an existing 3rd party service like Percy.io and Applitools. These services are fast, reliable, and just work.
I especially like the pull request review workflow. If a visual service detects a difference between the "gold" images it stores and the newly generated ones, it sets a failed commit check, and I know there are visual regressions. Anyone from the team can review the visual changes, comment, understand them. If the changes are really expected, the new images can be approved and become the new "gold" images to be compared against.
So that is all good and fun for web applications, but recently we have been refactoring CLI output from the Cypress Test Runner - and it is complicated. Our current output renders tables with multiple columns, uses terminal colors, text padding and alignment, hmm. We are using text snapshots, but they strip colors, and are relatively hard to judge or discuss as a team.
I want the same workflow for unit tests or CLI applications that output complex information to the terminal. That's why I have created this experiment:
- Capture CLI output from an app, for example from a test runner
- Convert ANSI control characters that set foreground and background colors to matching HTML styles. There are many small NPM utilities that do this.
- Send the generated HTML to Percy.io API
- Percy thinks this came from a real DOM snapshot
- it renders the terminal HTML in a real browser
- generates an image and compares it to the "gold"
Easy peasy.
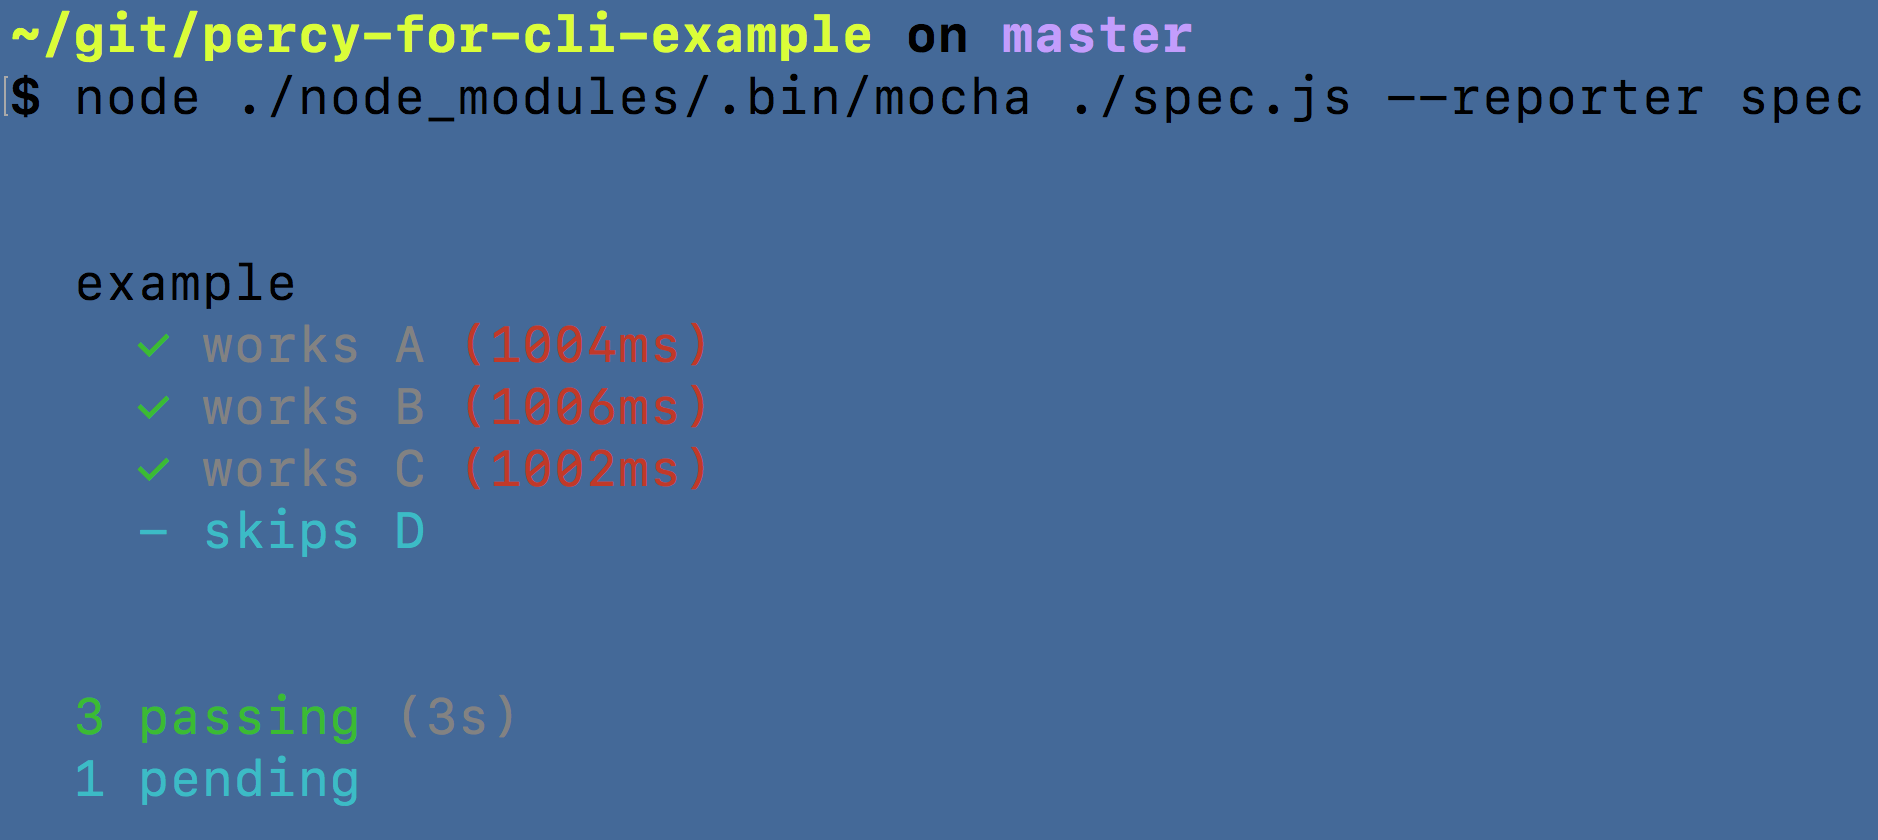
Here is the "standard" Mocha run in the terminal.
Here is how we can spawn Mocha from a parent process, yet force colors
1 | // force child process to output ANSI colors |
Here is how we convert ANSI characters to HTML using ansi-to-html
1 | // assuming the browser page is white |
The final HTML can be wrapped in <html> with utf8 meta flag and will look something like this
1 |
|
We can send this HTML to Percy API by running a local Percy agent, which runs by default on port 5338 and posting the generated HTML there. Here is how to run Percy and demo project.
1 | { |
Sending is just a POST request
1 | // post HTML to the Percy agent |
Percy API requires a private project token, I will inject it during run-time using as-a utility.
1 | as-a percy-for-cli-example npm run demo-percy |
The scripts runs and sends its terminal to visual diffing service as HTML string.
You can find Percy dashboard for this project at percy.io/bahmutov/percy-for-cli-example. All images uploaded from master branch are auto-approved, while images uploaded from other branches are compared to the "gold" images. For example the last build has 1 image with detected visual difference.
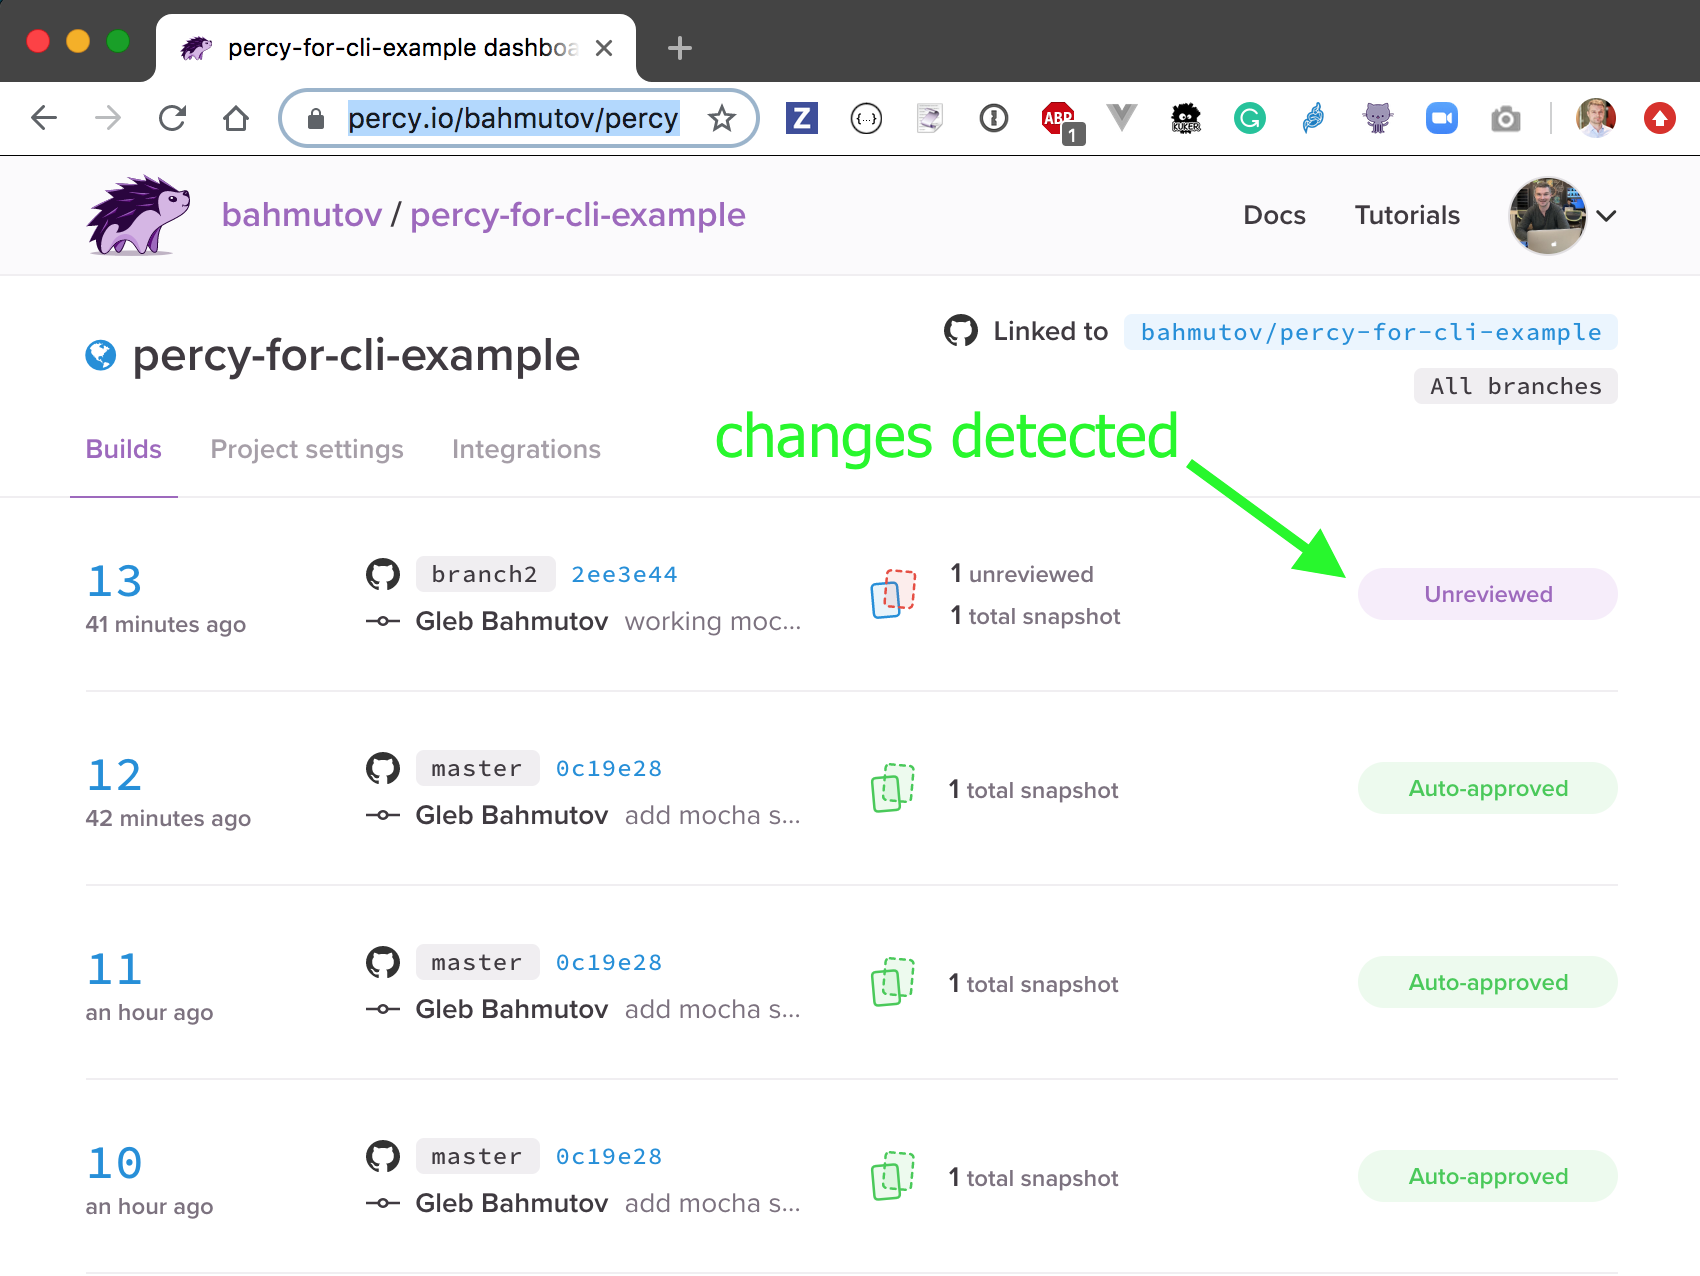
Someone from the team will have to go to the build and review the visual changes and either approve or reject them. In this case the difference is just in millisecond numbers - our snapshot needs to be sanitized before sending to Percy to avoid flagging trivial changes like this.
- Source bahmutov/percy-for-cli-example
- Percy project percy.io/bahmutov/percy-for-cli-example