Writing apps is hard. It is hard for many reasons, but for me one of the main reasons is the difficulty of thinking about all the possible states the application can be in. The web app is not a collection of routes and elements, but a model that changes from one state to another - and the UI merely reflects the current state.
So how can we express this in the front end world using JavaScript libraries and frameworks? This post will show how to use two small libraries to create a really simple application
- we will model application state and transitions using xstate state machine library
- we will draw the user interface using hyperapp micro framework
Let us start, you can find the code at bahmutov/lights-example.
State machine
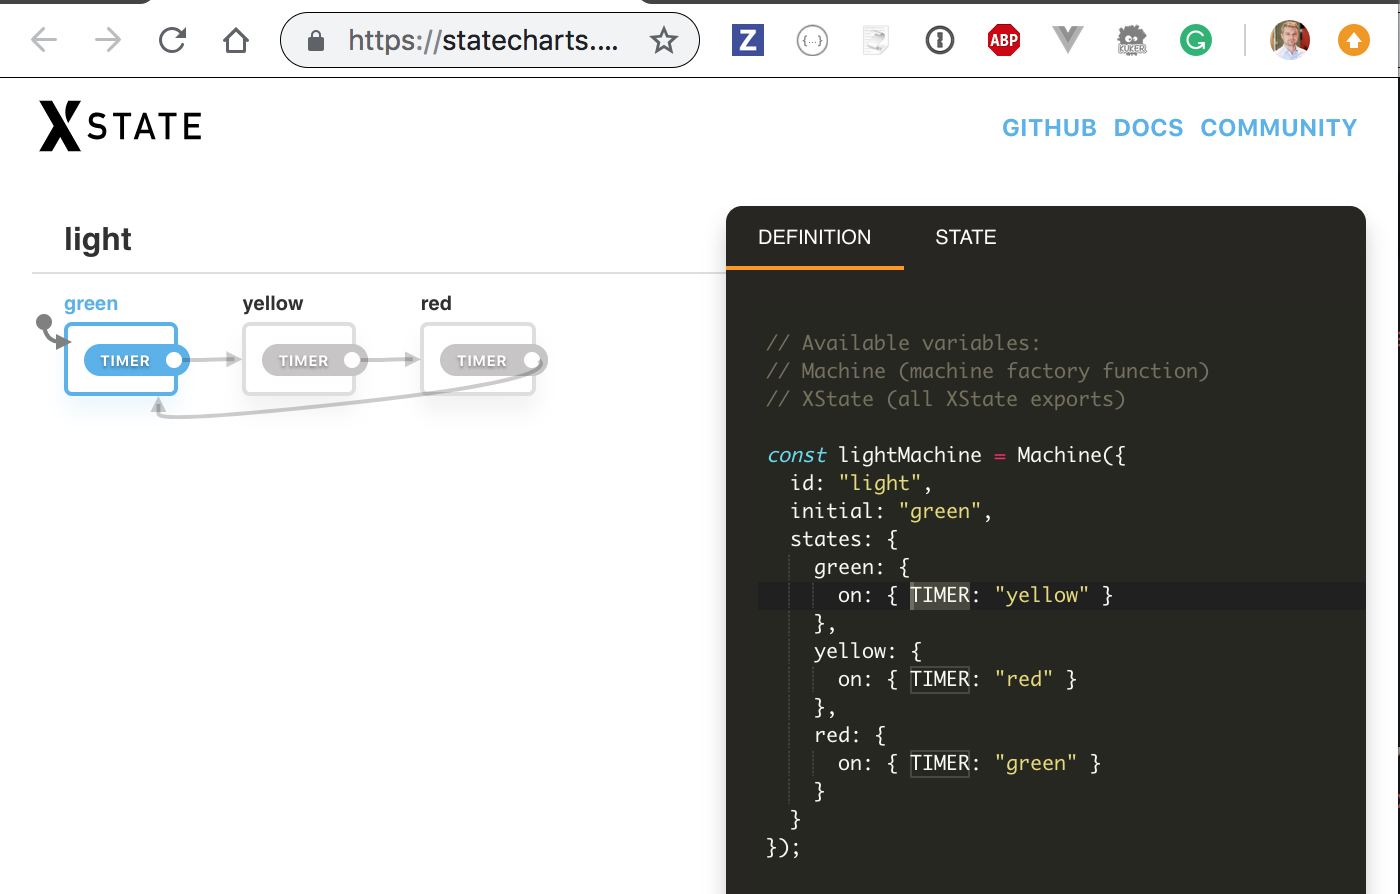
I have copied the state machine code straight from the xstate example
1 | import { Machine } from 'xstate'; |
The machine starts in the initial green state, and on TIMER event can go from green to yellow state. If we send the TIMER event again, it will go from yellow to red. Send TIMER again and it is back to green state, completing the cycle. You can visualize this state machine at https://statecharts.github.io/xstate-viz/
Application
Now that we have our state machine, let us write an application using Hyperapp JavaScript framework. The first thing we need is to decide what our state object would be. This is different from the state machine above. Just to keep things clear, our application's state object will have just a single property named xstate with our state machine. At the start, it will be the initial state of the state machine.
1 | import { app } from 'hyperapp' |
The view function renders a single element and sets its class based on the current state's value
1 | import { h } from 'hyperapp' |
When the user clicks on the element, action onclick is triggered, and it should "move" our application's machine from one state to the next.
1 | import machine from './machine' |
Beautiful, the xstate object is passed by the Hyperapp framework and we change it according to the ./machine rules and return it from the onclick action. Hyperapp then triggers the view function again passing the updated { xstate } object and the process repeats.
Page
First, our HTML page only includes a style and a script tag
1 | <head> |
I am going to serve it using Parcel bundler and here is the magical web application in action. I am clicking on the page several times.
Testing from state machine
The above web application renders user interface as a function of the current state. Literally, the function view takes { xstate } as a parameter and returns virtual DOM node that should be shown to the user
1 | vDOM = view({ xstate }) |
How should we test this application? Well we could define our tests "normally" by looking at the application's DOM and driving the app. Using Cypress.io I can write this test like
1 | /// <reference types="cypress" /> |
and it works, the application really rotates through the CSS classes
But how do we know that these transitions we wrote by looking at the application's HTML are actually correct? What if our web application renders the state incorrectly or moves the state to a wrong state when the user clicks? With a state machine we can do a neat trick: we can generate the end-to-end test from the state machine!
I will write a small utility script that loads the machine and then traverses all paths - and keeps only the ones from the initial state "green".
1 | import { getShortestValuePaths } from 'xstate/lib/graph' |
The result printed is
1 | [ { state: 'yellow', event: 'TIMER | {}' }, |
Normally I would save this list into a JSON file, but for such a short list I can manually copy it to a new spec called cypress/integration/auto.js. But first, I will change my view.js to export a few utilities to share code between the application and the test, like selector and getAppClass
1 | import { h } from 'hyperapp' |
Here is my automated spec file. Notice how it uses imported helper methods from view.js to drive particular DOM implementation without repeating the code
1 | /// <reference types="cypress" /> |
Our test behaves the same way, but now it is derived from the state machine and its possible transitions. Plus it uses a little bit of the logic from the view code, thus our UI and our tests are derived like this
1 | vDOM = view({ xstate }) |
and our tests now cover 100% of the possible states and transitions, no matter what code coverage metric says (for our bundle the e2e test auto.js covers about 66% of the total bundle code, which includes application code and hyperapp and xstate libraries).