If a Cypress test fails and you are recording the test run on Cypress Dashboard Cloud, the screenshot image is uploaded and stored with the test run. The screenshot and the video are stored with the test and allow debugging the failure. You can also send screenshots of the entire test runner, the application, or individual elements to the cloud using the built-in cy.screenshot command. In this blog post, I will show how to upload your own images instead of the page screenshots.
🎁 You can find my example project in the repo bahmutov/cypress-image-to-cloud and its recorded test runs at Cypress Cloud project.
Solution 1: temporary image element
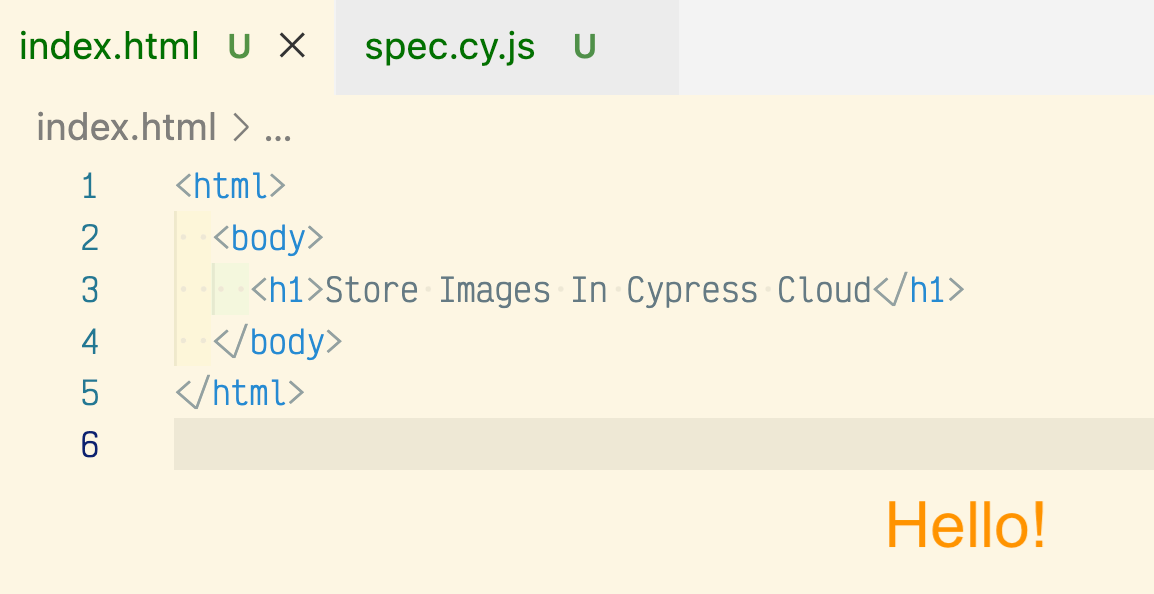
Imagine we take an image "hello.png" below and want to upload it to the Cloud.
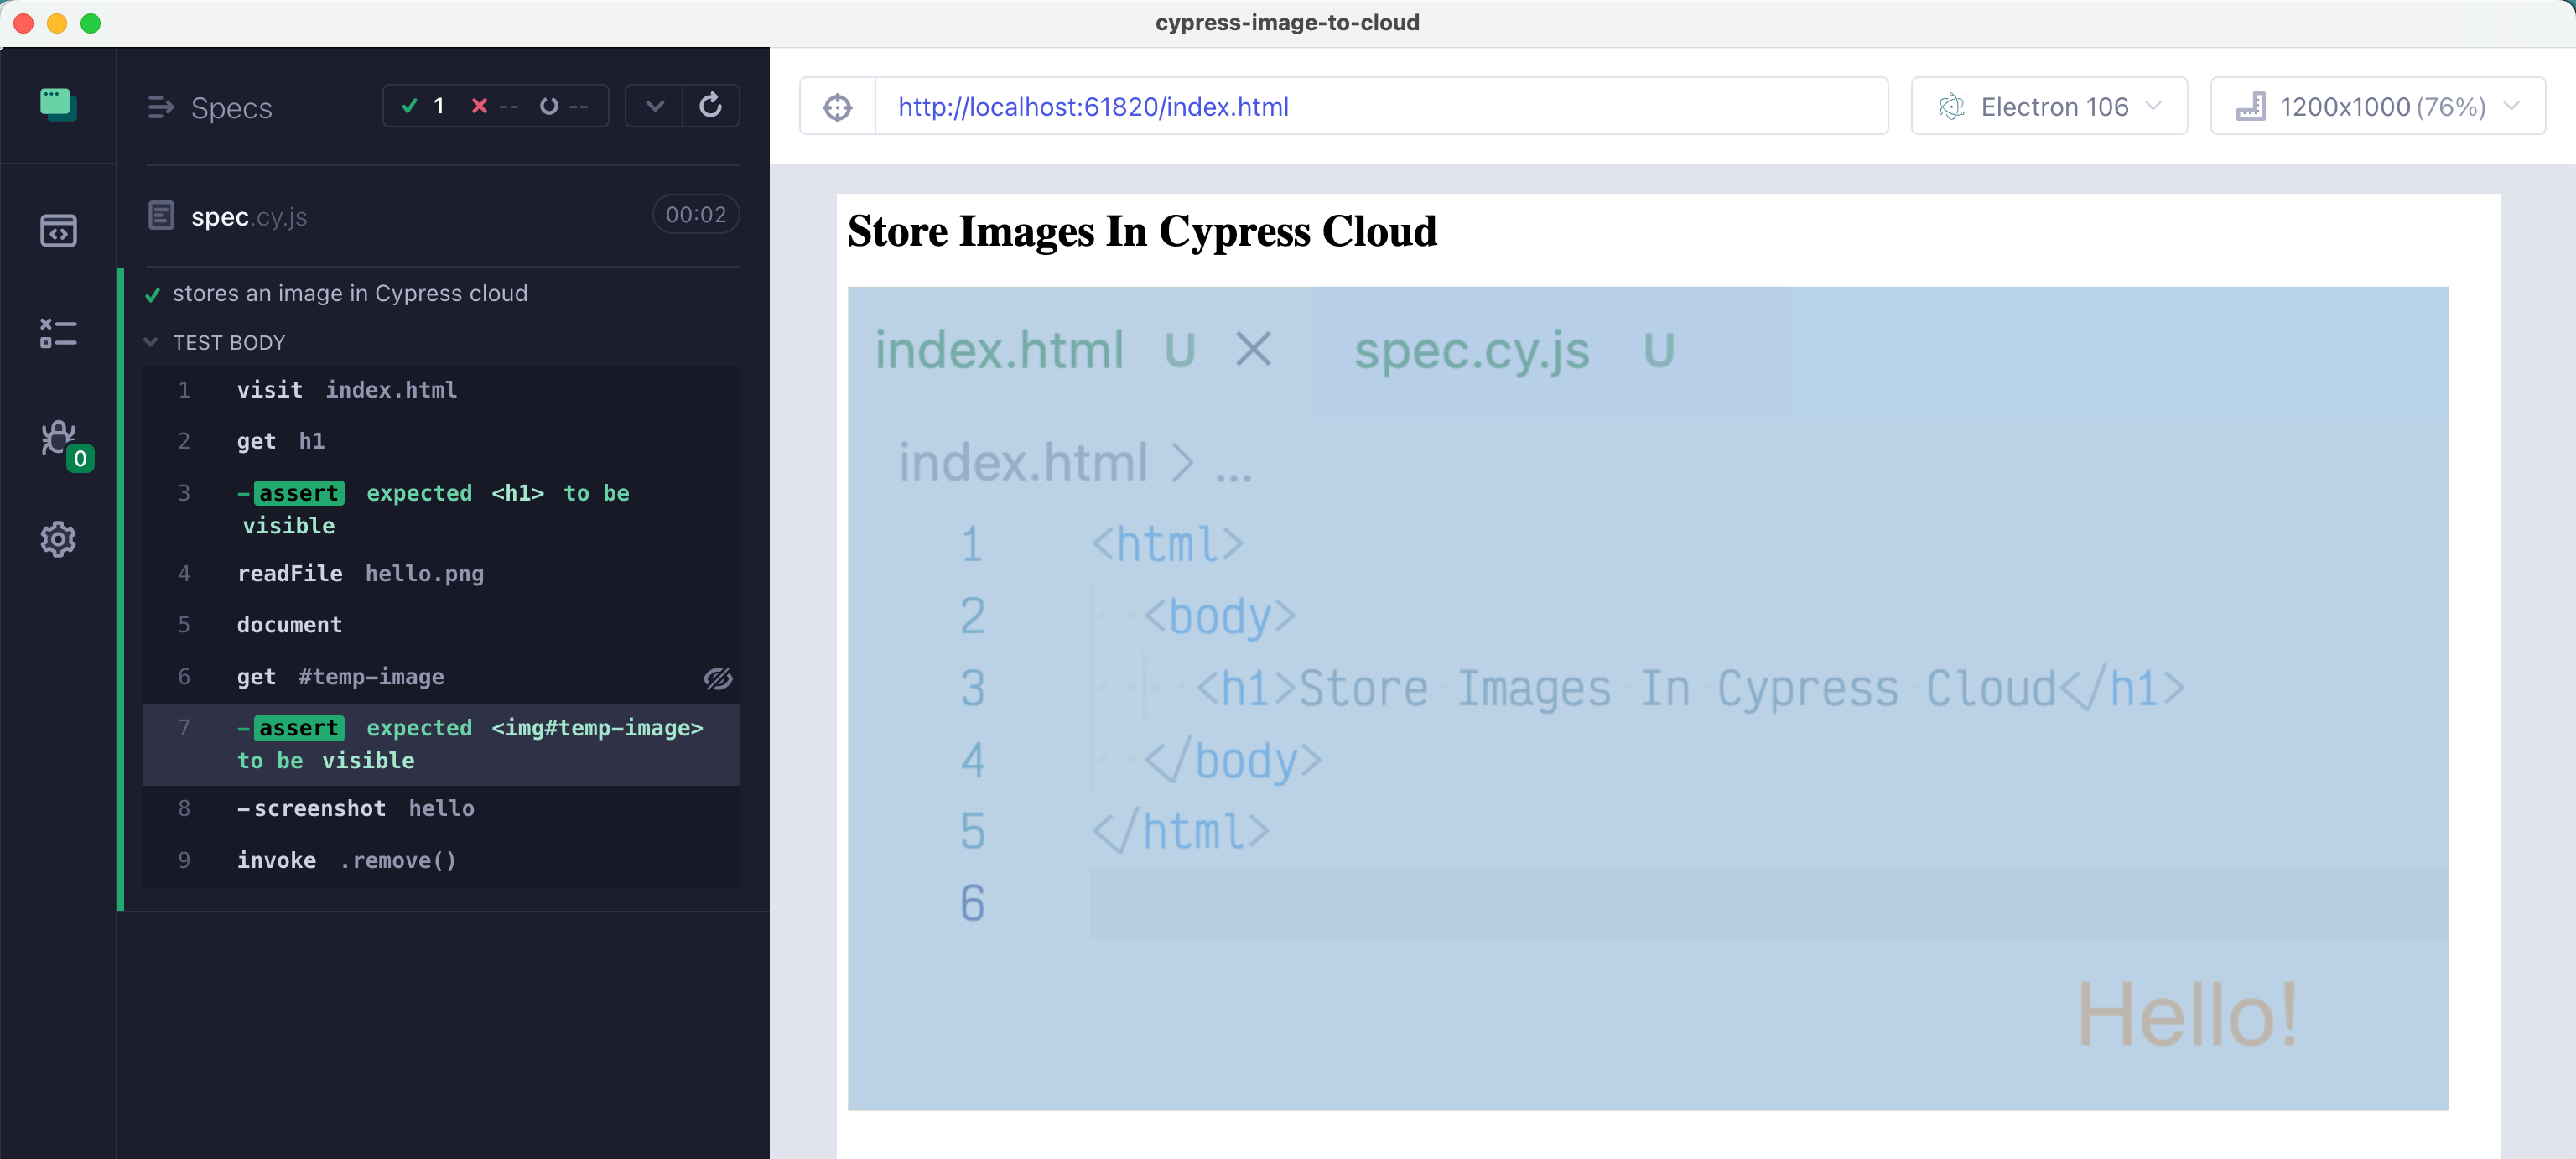
Our first solution will read the image contents and then attaches it to the document using a temporary <img src="data..." element. We can use the bundled jQuery under Cypress.$ to write the test.
1 | it('stores an image in Cypress cloud', () => { |
The <img> appears and disappears, but its element screenshot is uploaded by the cy..screenshot('hello', { overwrite: true }) command
Solution 2: afterScreenshot Node API
A better solution in my opinion can avoid creating an image element just to upload it. We can use Cypress after screenshot API to "replace" the screenshot taken with a path to our image. It does not matter what screenshot we take. I like using the entire runner because it is faster since it avoids taking multiple screenshots to be stitched together.
1 | const { defineConfig } = require('cypress') |
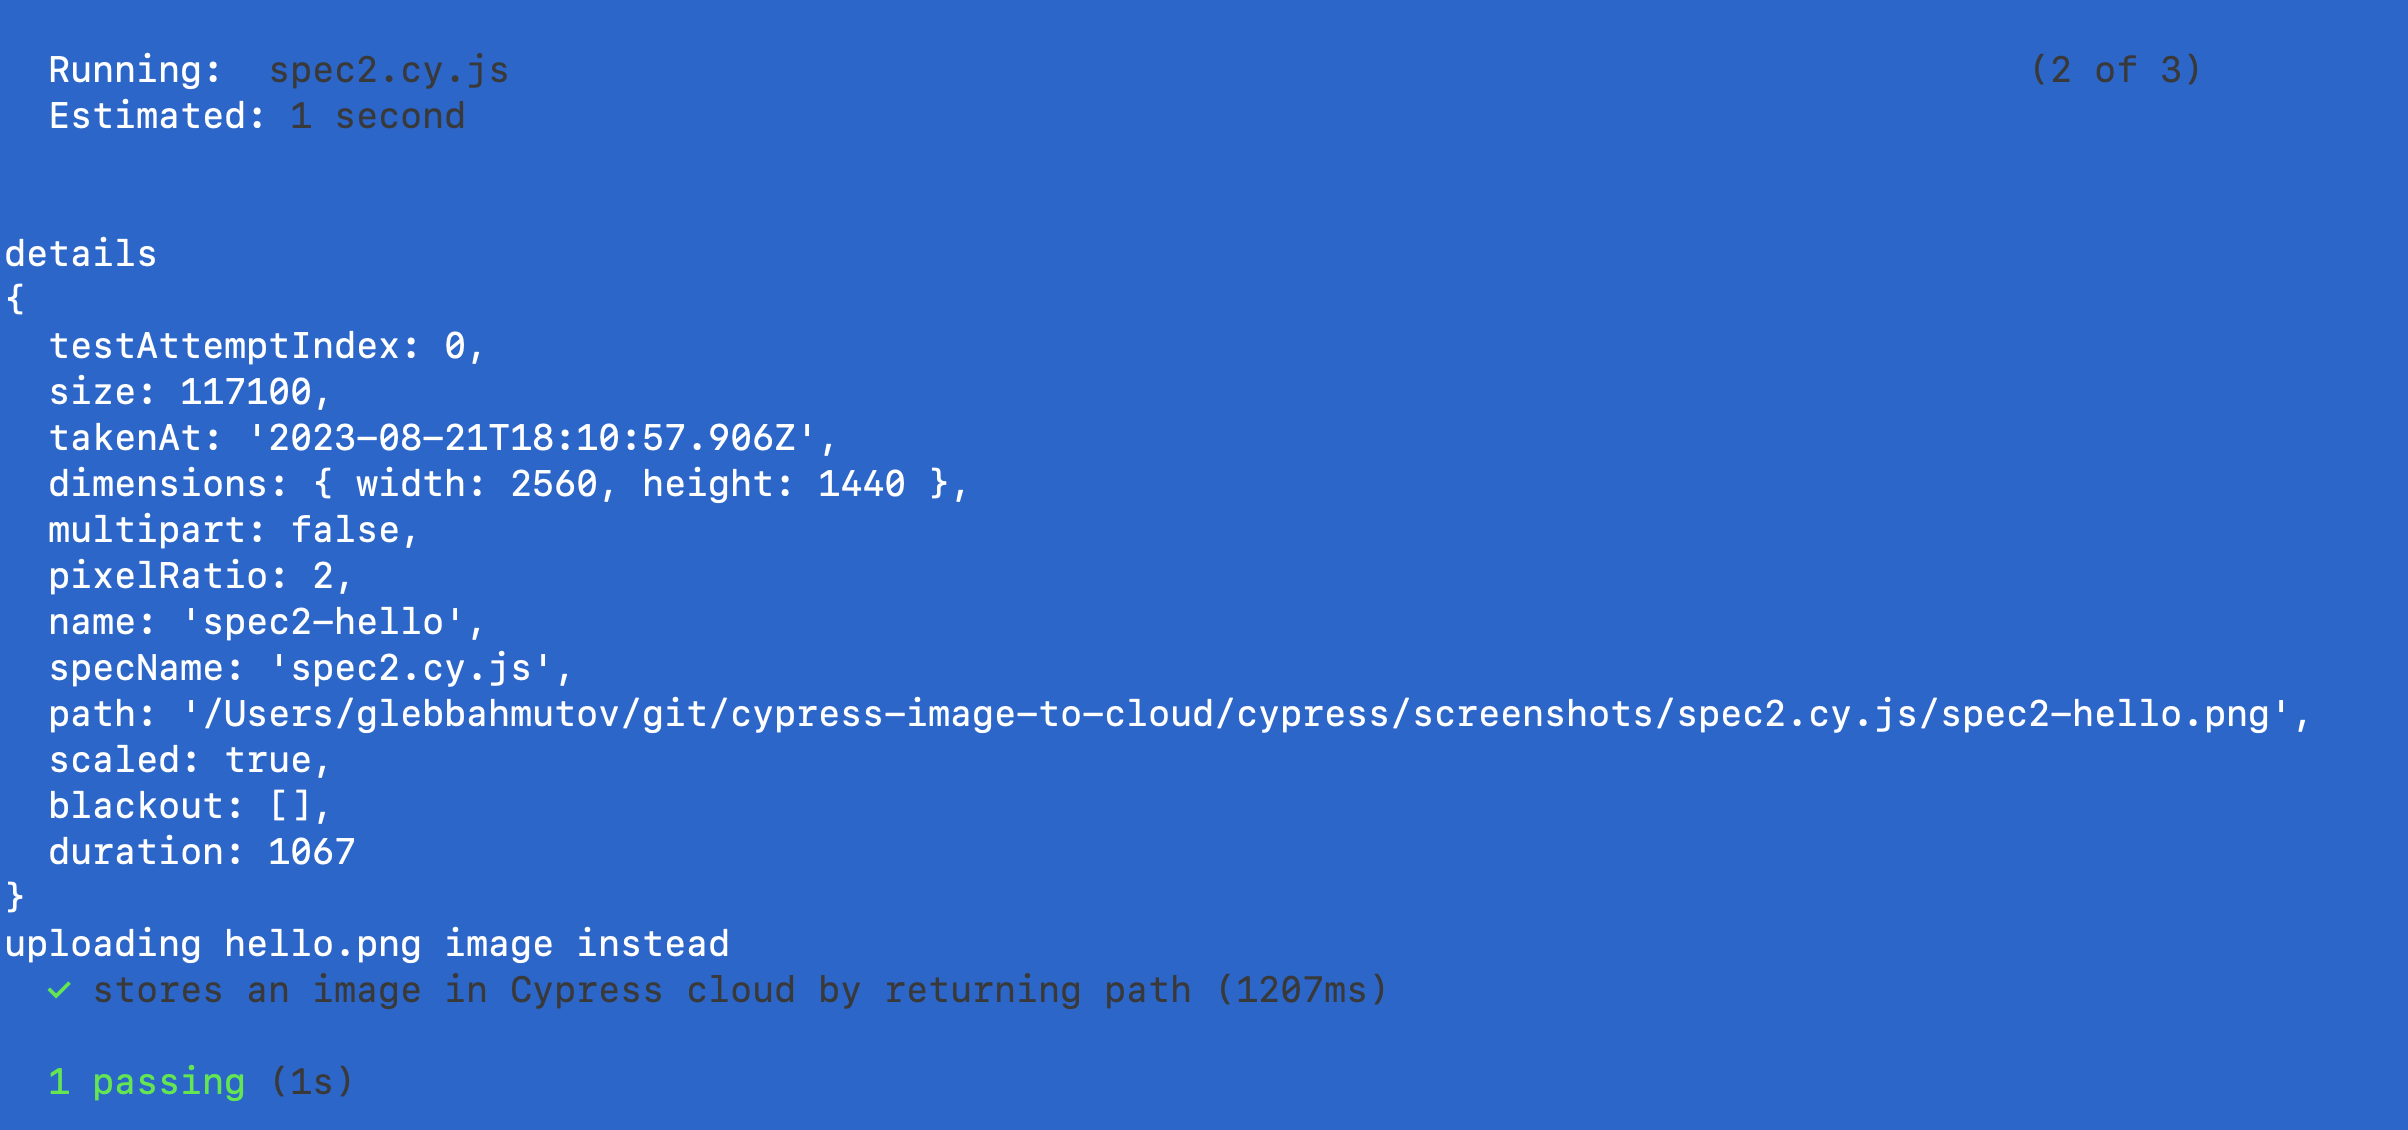
The corresponding spec needs to take a screenshot named "spec2-hello" to trigger our Hello image upload
1 | it('stores an image in Cypress cloud by returning path', () => { |
The details of the image are shown in the terminal output
Note: each cy.screenshot command provides onAfterScreenshot callback, but you cannot replace the image path in that callback, unfortunately.
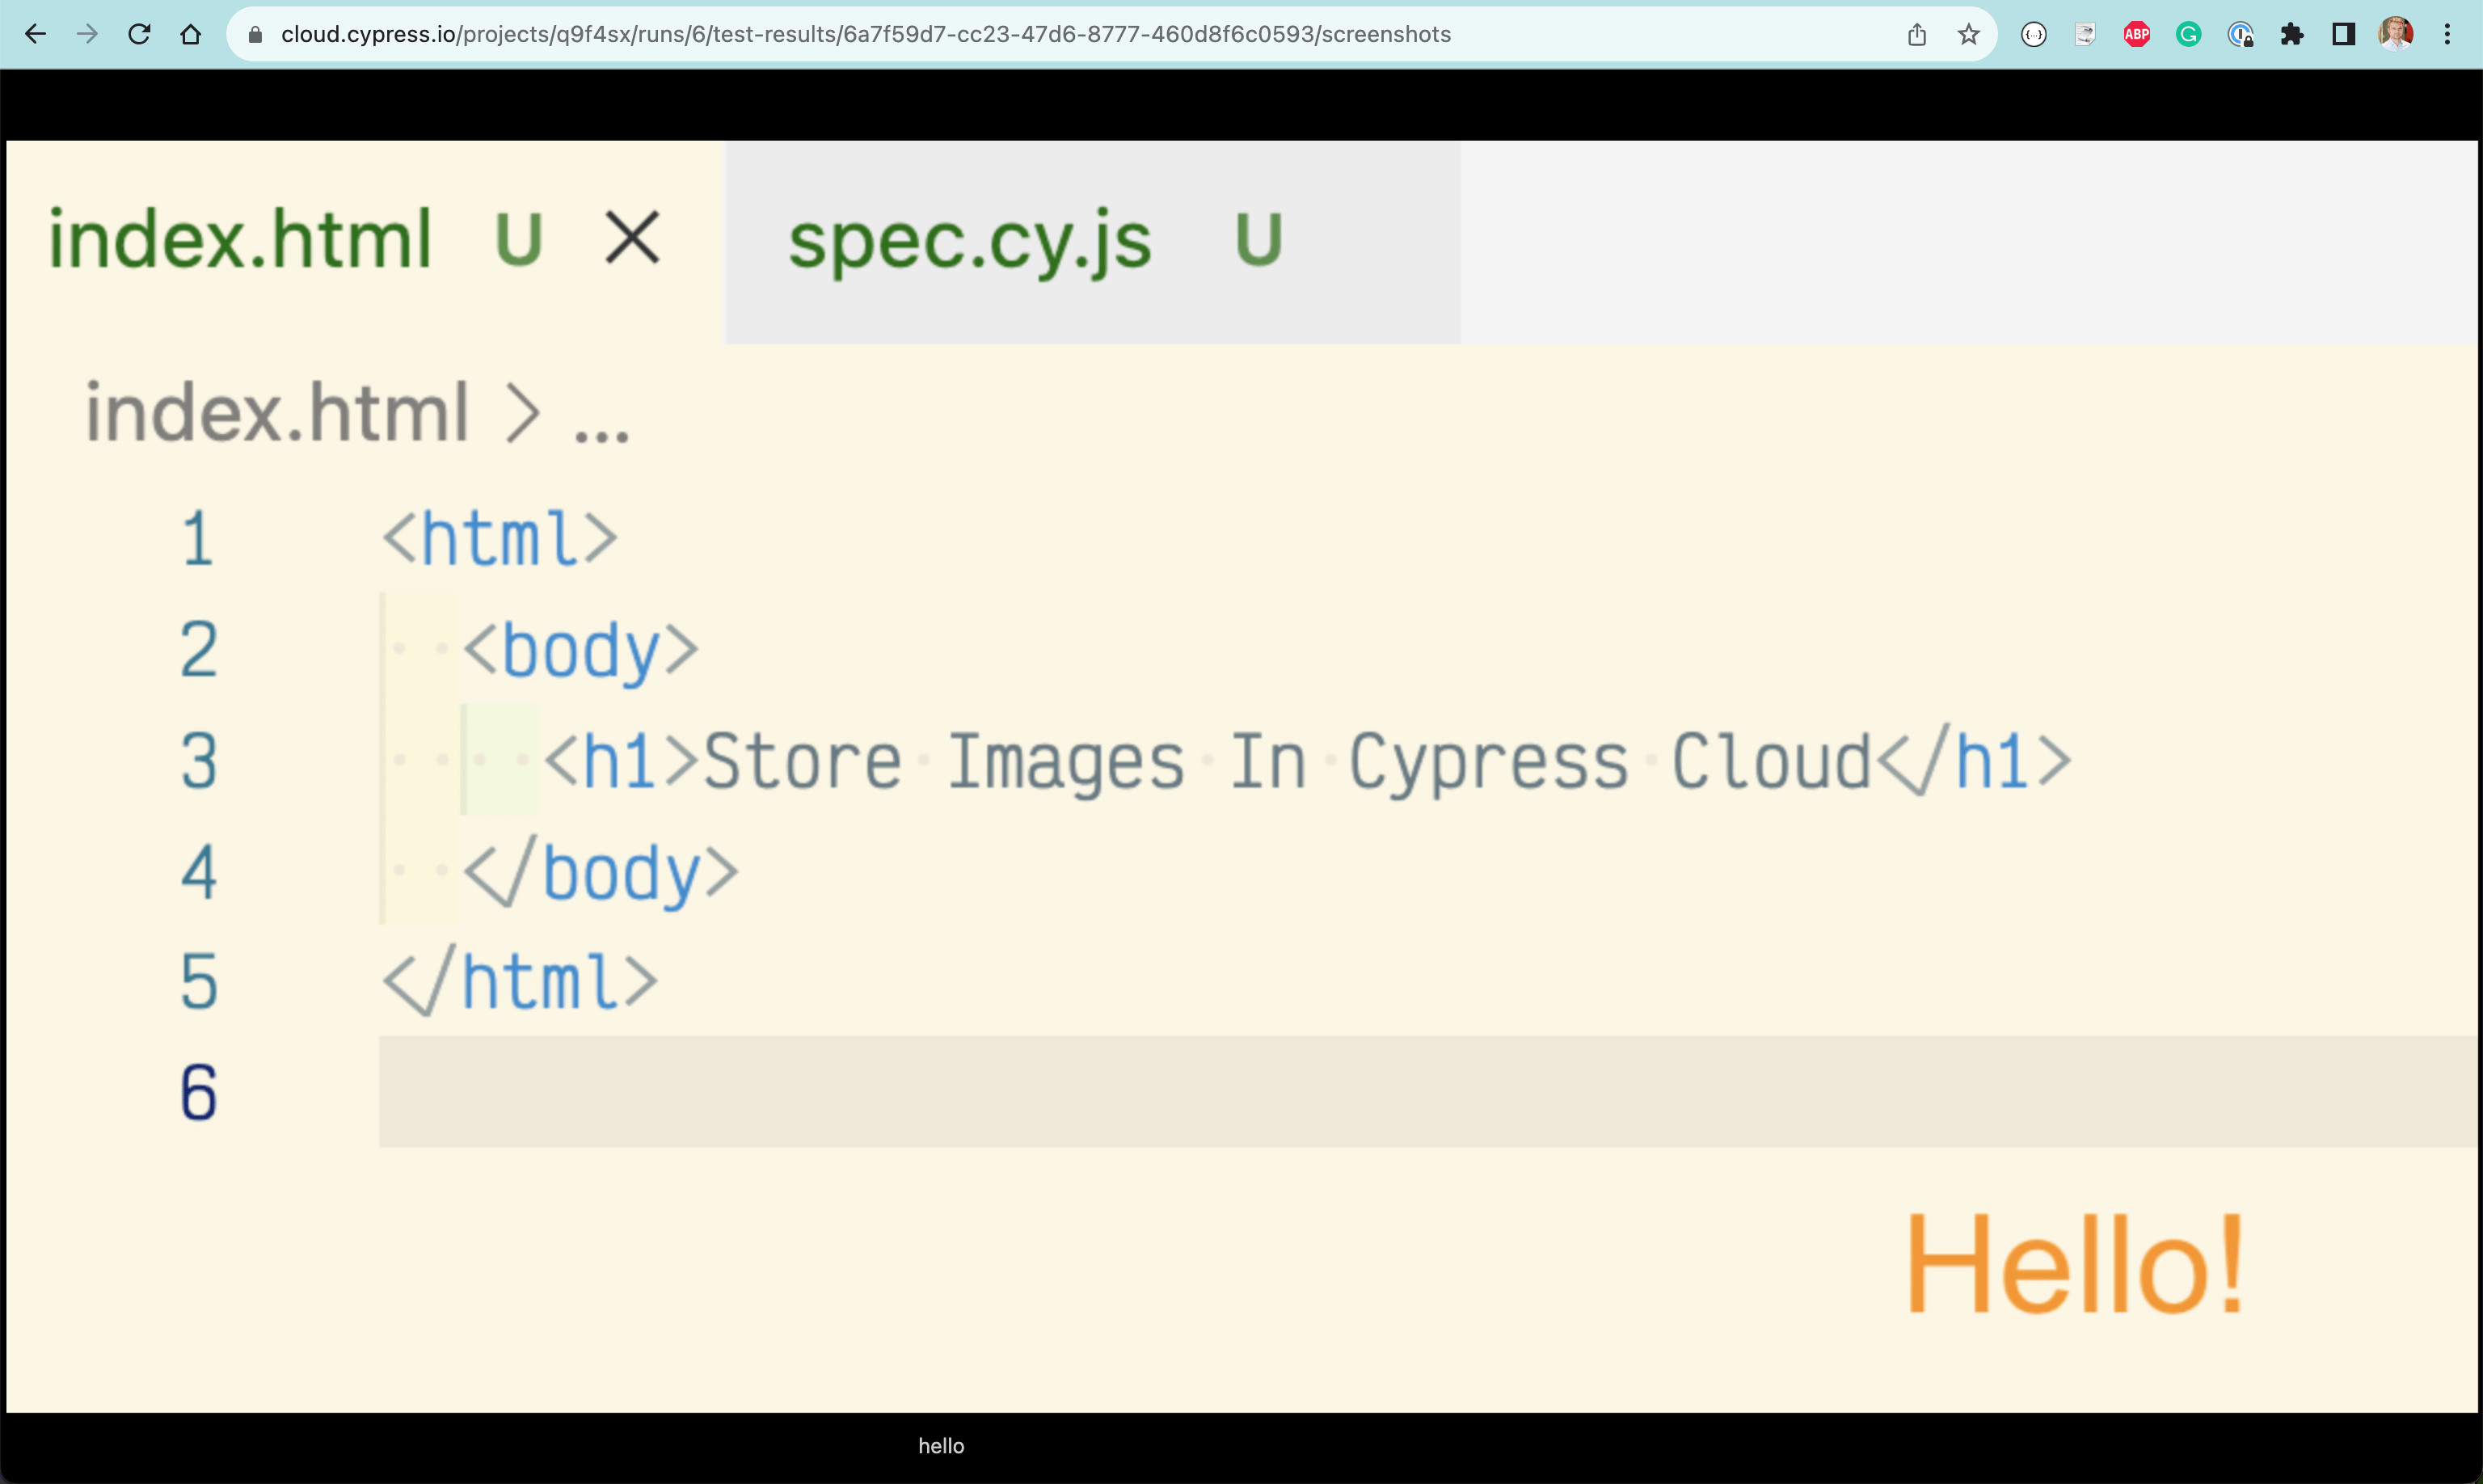
The Cloud screenshots
You can find the results of recording these tests on the project's Cloud page. Go to the "Specs" view and click on the screenshots thumbnail buttons.
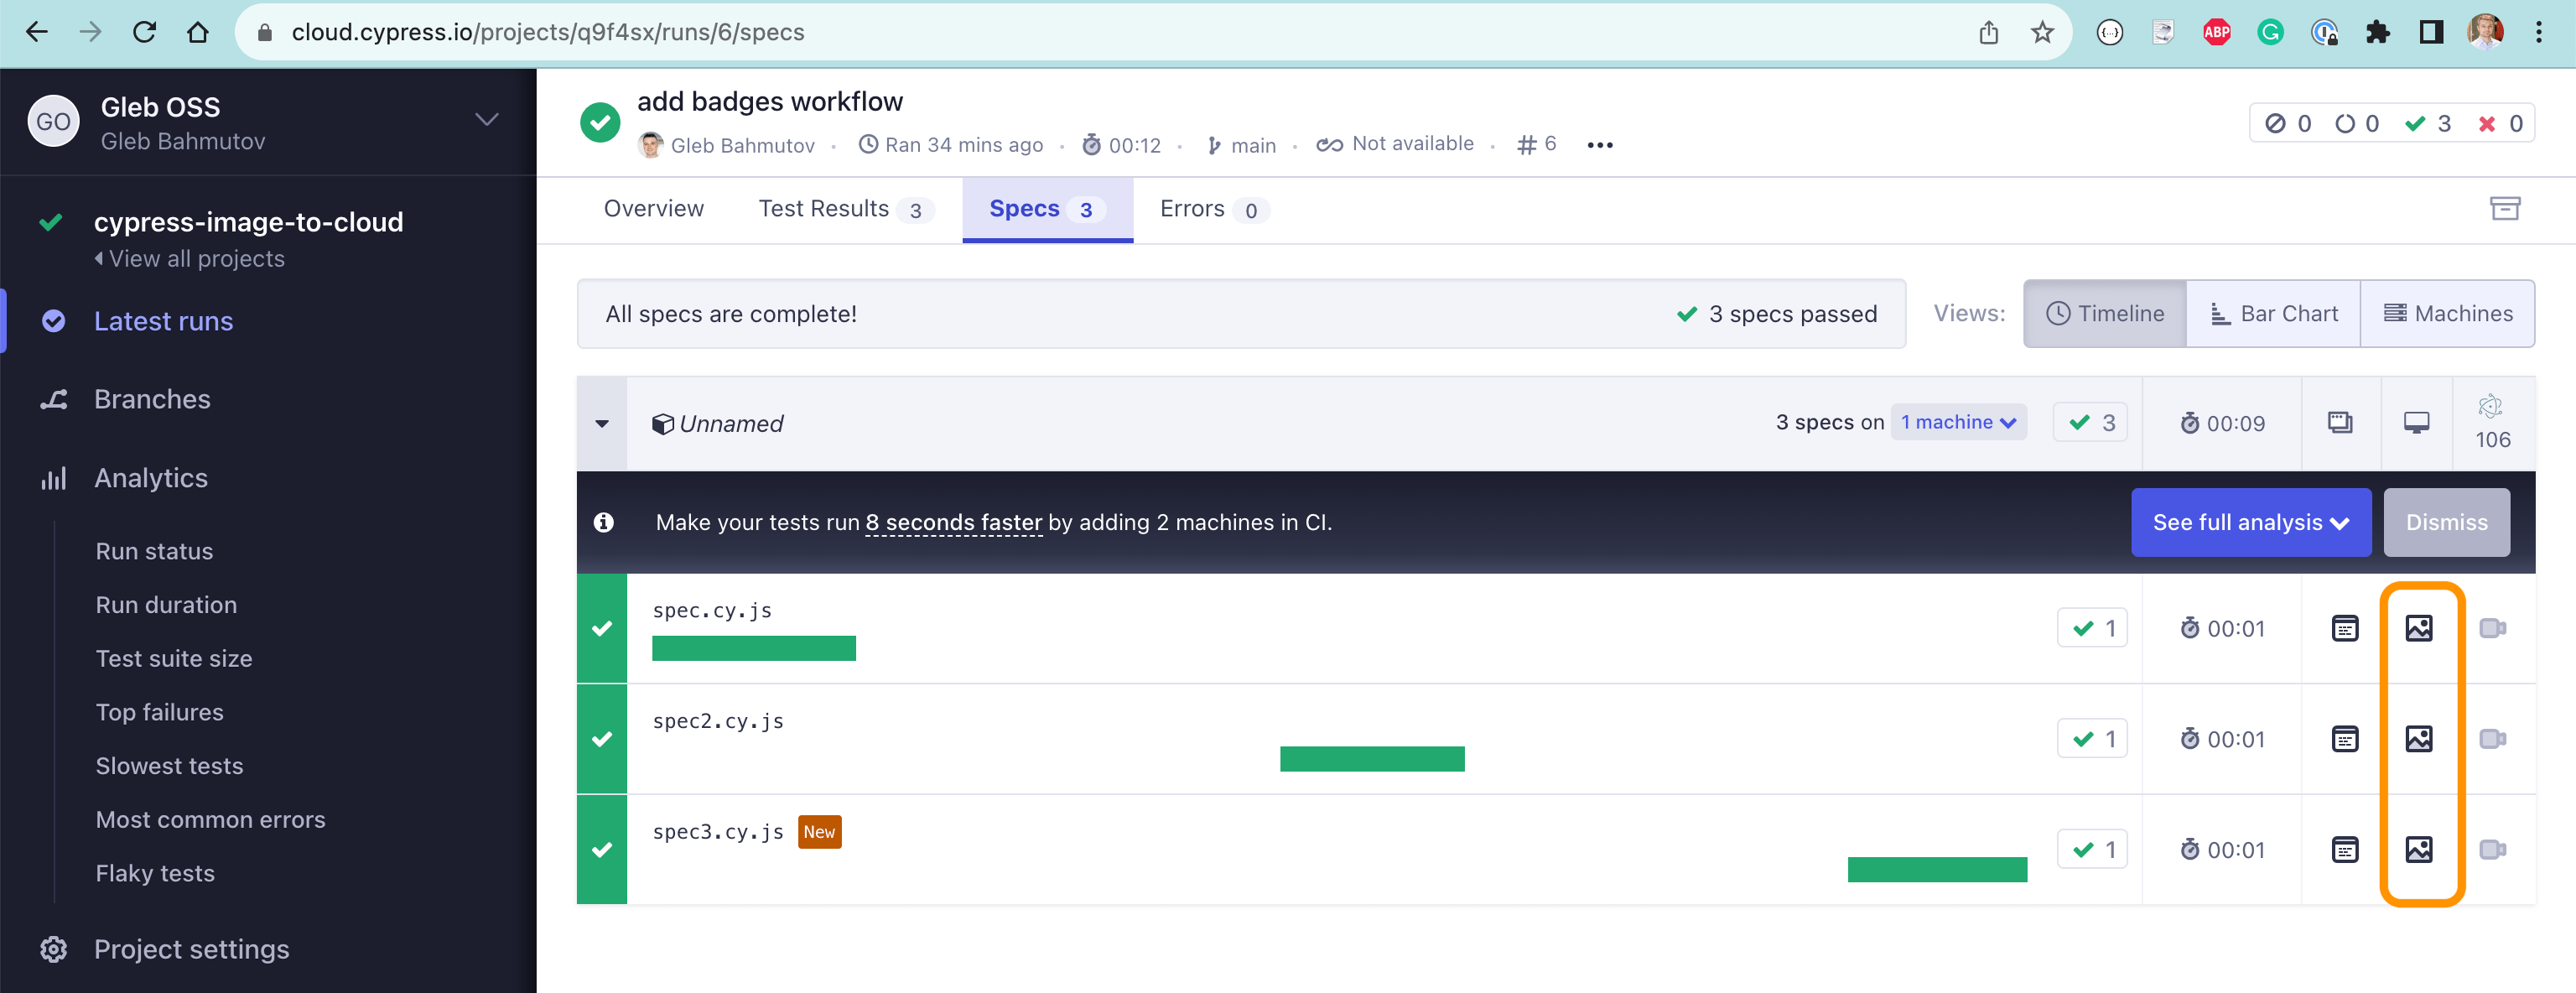
Click on the screenshot button to see your image.
Hope you find some use for this trick.