Recently I began looking again at testing emails sent as part of the user registration process. I wanted a quick way to set up end-to-end testing and decided to give cypress-mailosaur a try. In less than five minutes I had a working test!
🎁 You can find the source code for this blog post in the repo bahmutov/cypress-sendgrid-mailosaur-example.
The application
The user enters the sign-up information and submits a form. We can start writing the test immediately
1 | /// <reference types="cypress" /> |
Tip: even in purely JavaScript tests, I check types to avoid silly mistakes. All you need is to use these special comments to get the IntelliSense in modern code editors. For more, read Convert Cypress Specs from JavaScript to TypeScript.
1 | /// <reference types="cypress" /> |
The application takes the user sign-up request and fires off a SendGrid API request. The code goes something like this:
1 | // sending emails using the full SendGrid API |
We submit the information and the design ID to use as a JSON API call.
SendGrid email
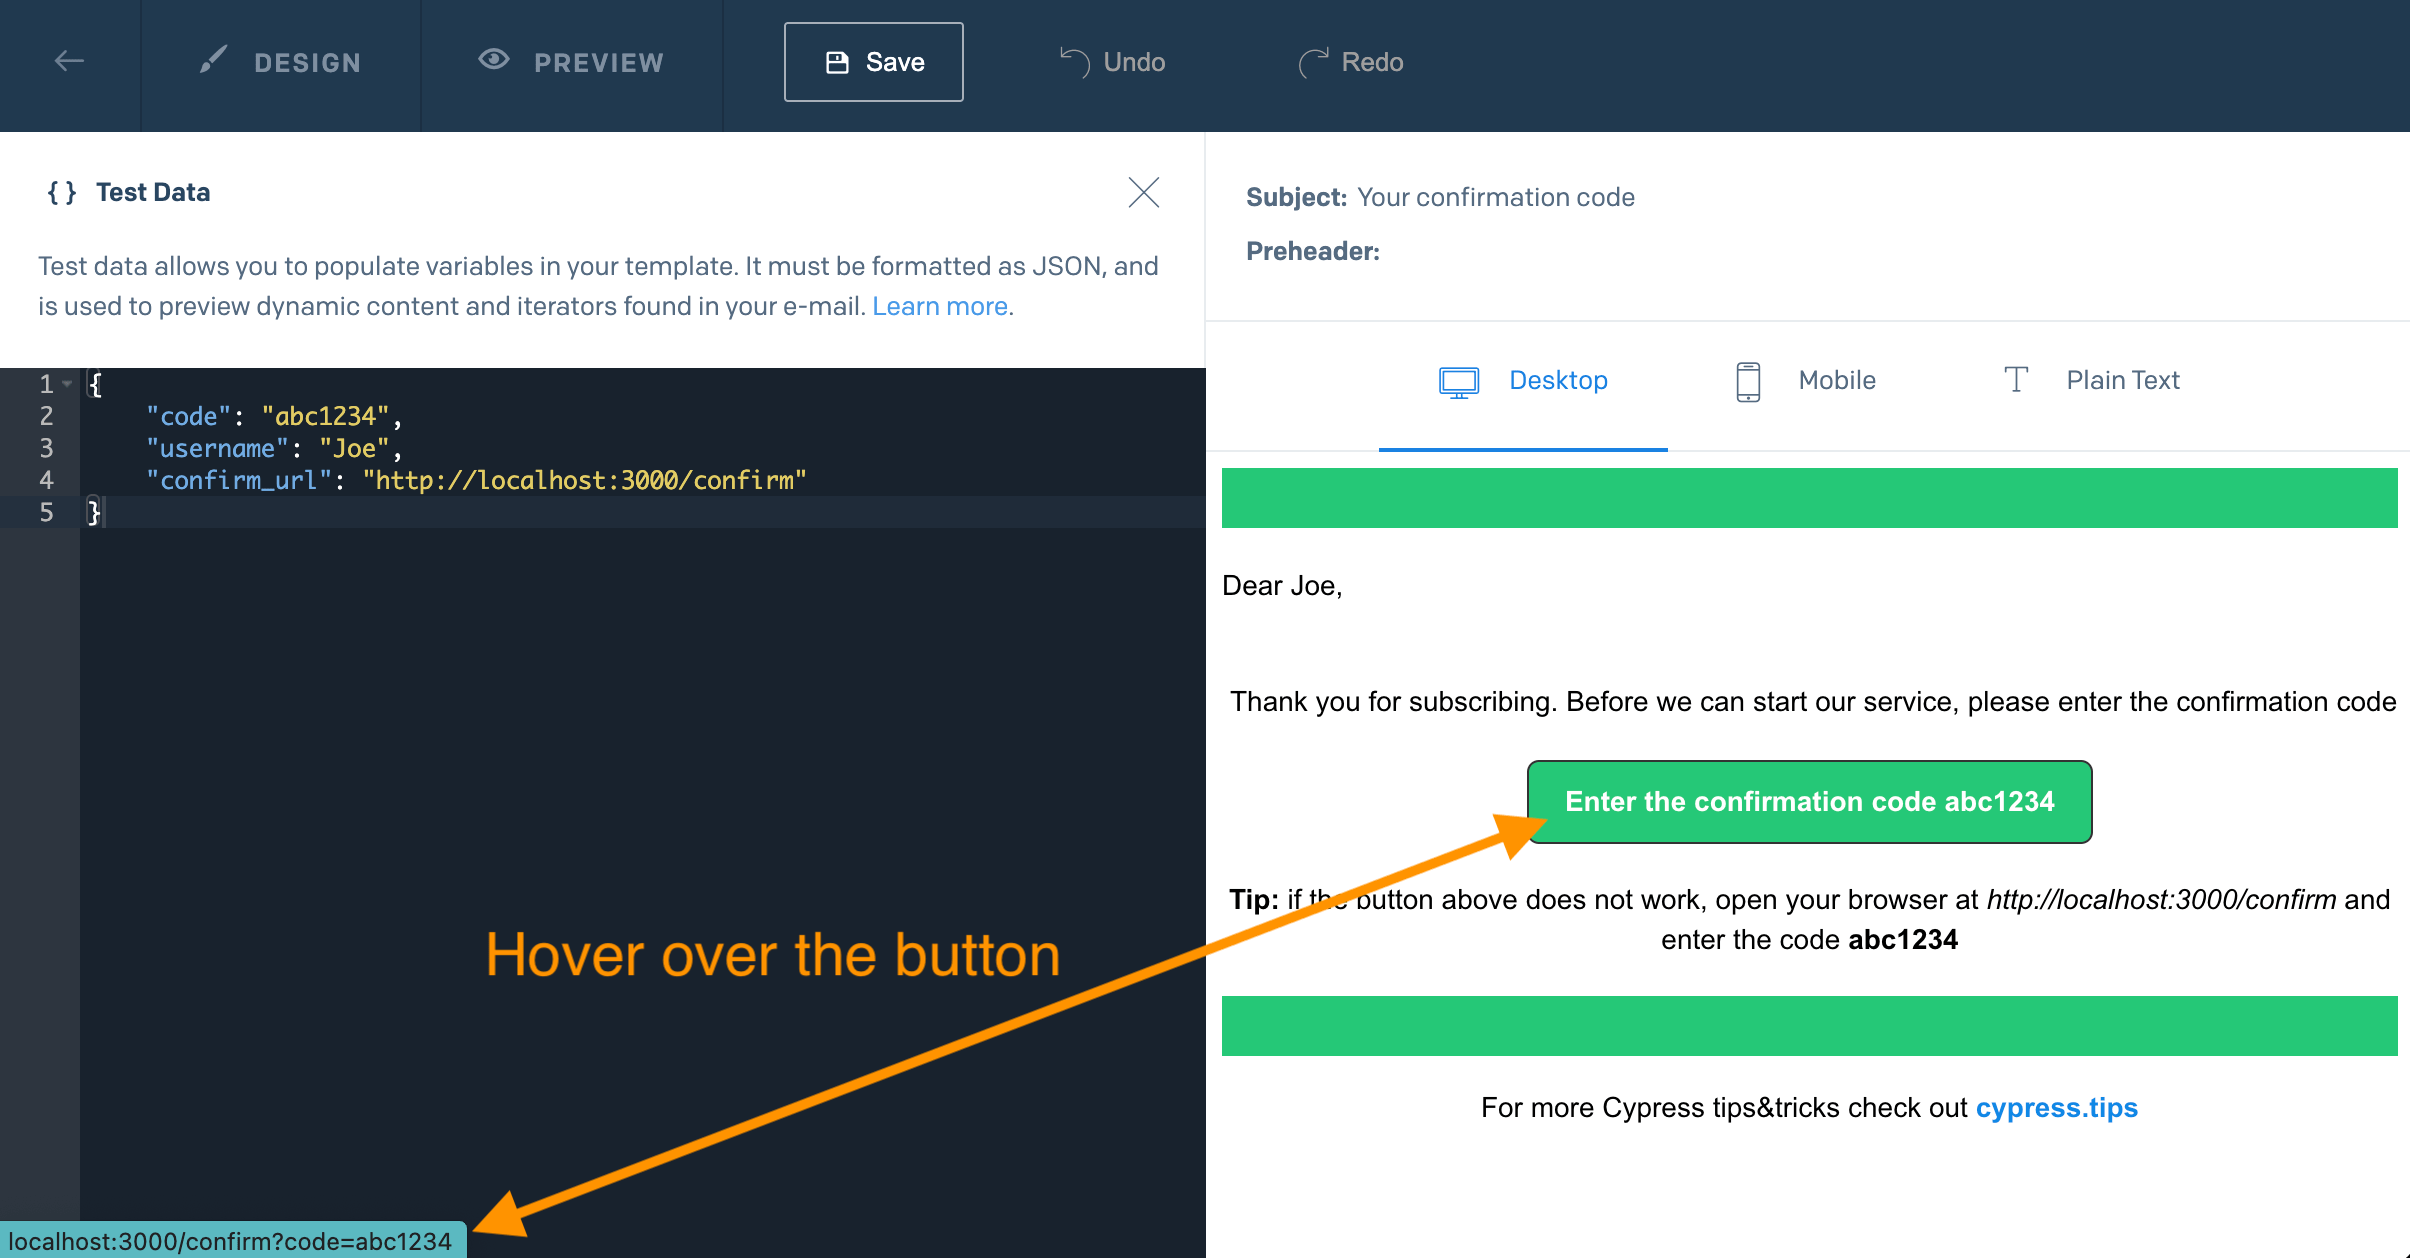
A typical SendGrid email design looks like this:
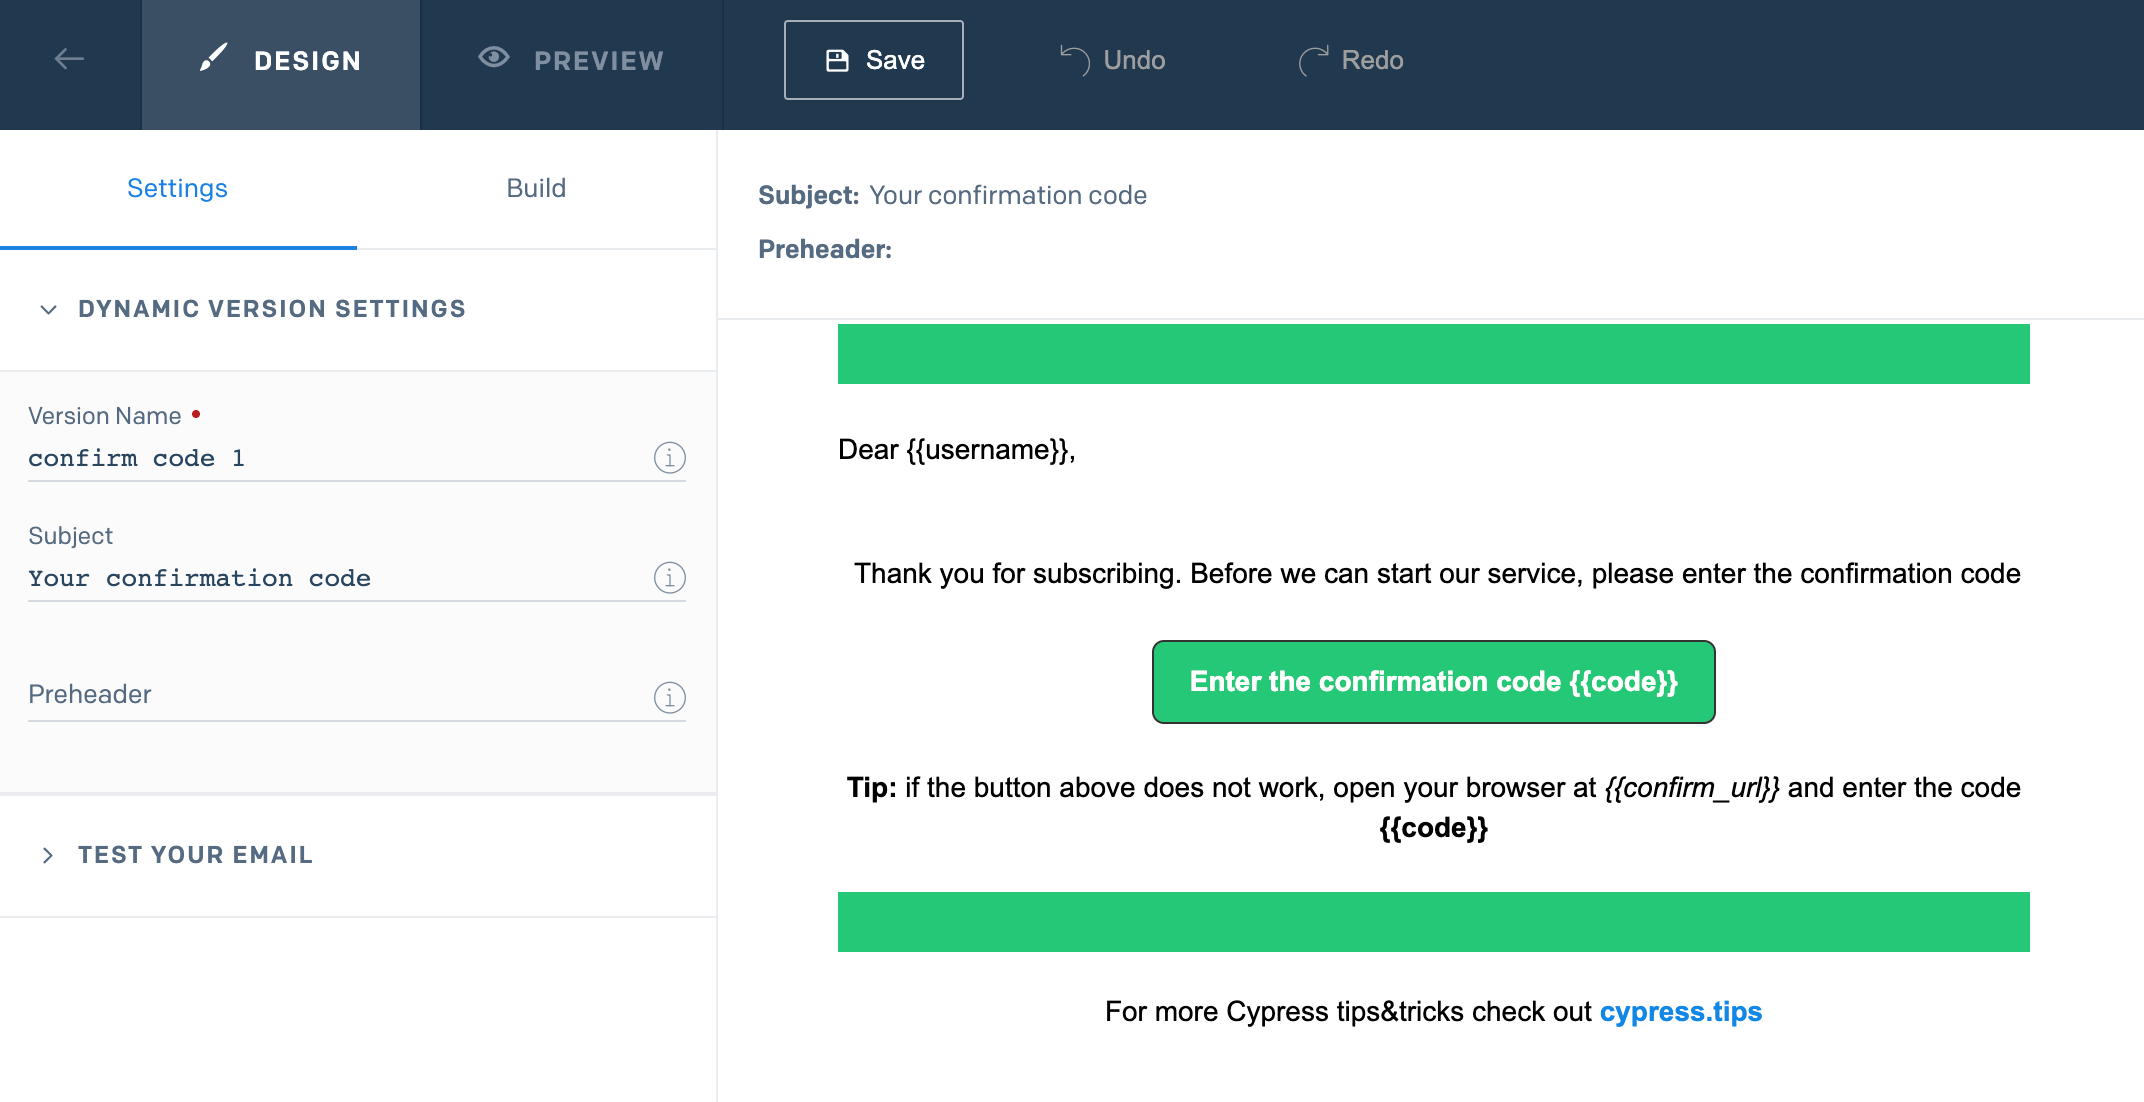
We can use data variables we send in the dynamic_template_data object using {{ name }} syntax. We can even see the finished email if we fill the test data object in the editor. This is how the email will look like, and it even includes the button target URL:
Once the API request arrives to SendGrid, it formats the HTML + Text email and sends it using SMTP protocol. All we need is a valid email to receive it.
Mailosaur
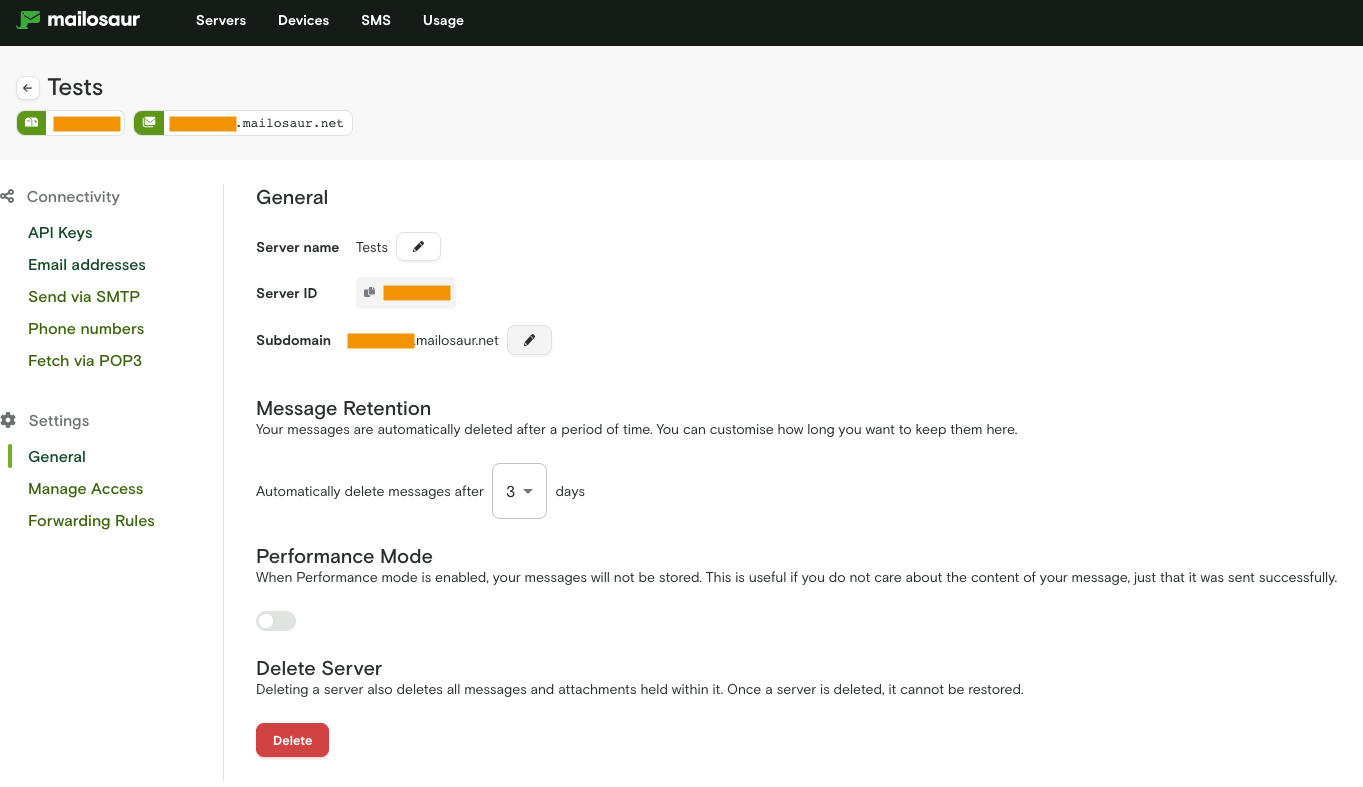
Mailosaur is an online email and 2FA token testing service. Once I signed up, it assigns me a random server hostname like abc123.mailosaur.net. Any email delivered to this server hostname will appear in my test inbox. For example, my tests could email [email protected] or test-user-1234.mailosaur.net, and the emails will be delivered to the same inbox.
Once I create a Mailosaur API key, I am good to go.
Note: I keep the server Id confidential, but anyone sending the emails will reveal it, since it is part of the email address. For sure keep the Mailosaur API key private to yourself.
In my test project I have installed the cypress-mailosaur plugin.
1 | $ npm i -D cypress-mailosaur |
All I need to do is to include the cypress-mailosaur plugin in my spec or support file loaded in the browser.
1 | // https://github.com/mailosaur/cypress-mailosaur |
Before we begin, we need to talk about SendGrid and Mailosaur API keys.
API keys
When running the application we need to provide the SendGrid API key and a "from" email address. We want to keep these settings confidential. When running Cypress tests, we want to provide the tests running in the browser with the Mailosaur API key and the server Id. The way I like keeping this information external to the source code is by injecting the values through the environment variables when needed. I use my own as-a utility. Here is the .as-a.ini file I have in the project's folder (and ignored by Git)
1 | ; http://github.com/bahmutov/as-a |
Assuming I am in the folder called "cypress-sendgrid-mailosaur-example", to run the application from one terminal I would execute as-a . npm start. Then from another terminal I would open Cypress with as-a . npx cypress open. The environment variables that start with CYPRESS_ are automatically parsed by Cypress and are available using Cypress.env() command.
Tip: even better, I use start-server-and-test to start the app and open Cypress using simple as-a . npm run local NPM script:
1 | { |
Use Mailosaur email
Let's use a real dynamic email with our test.
1 | /// <reference types="cypress" /> |
The test sends an email to a real inbox with some random characters to allow us to easily find it.
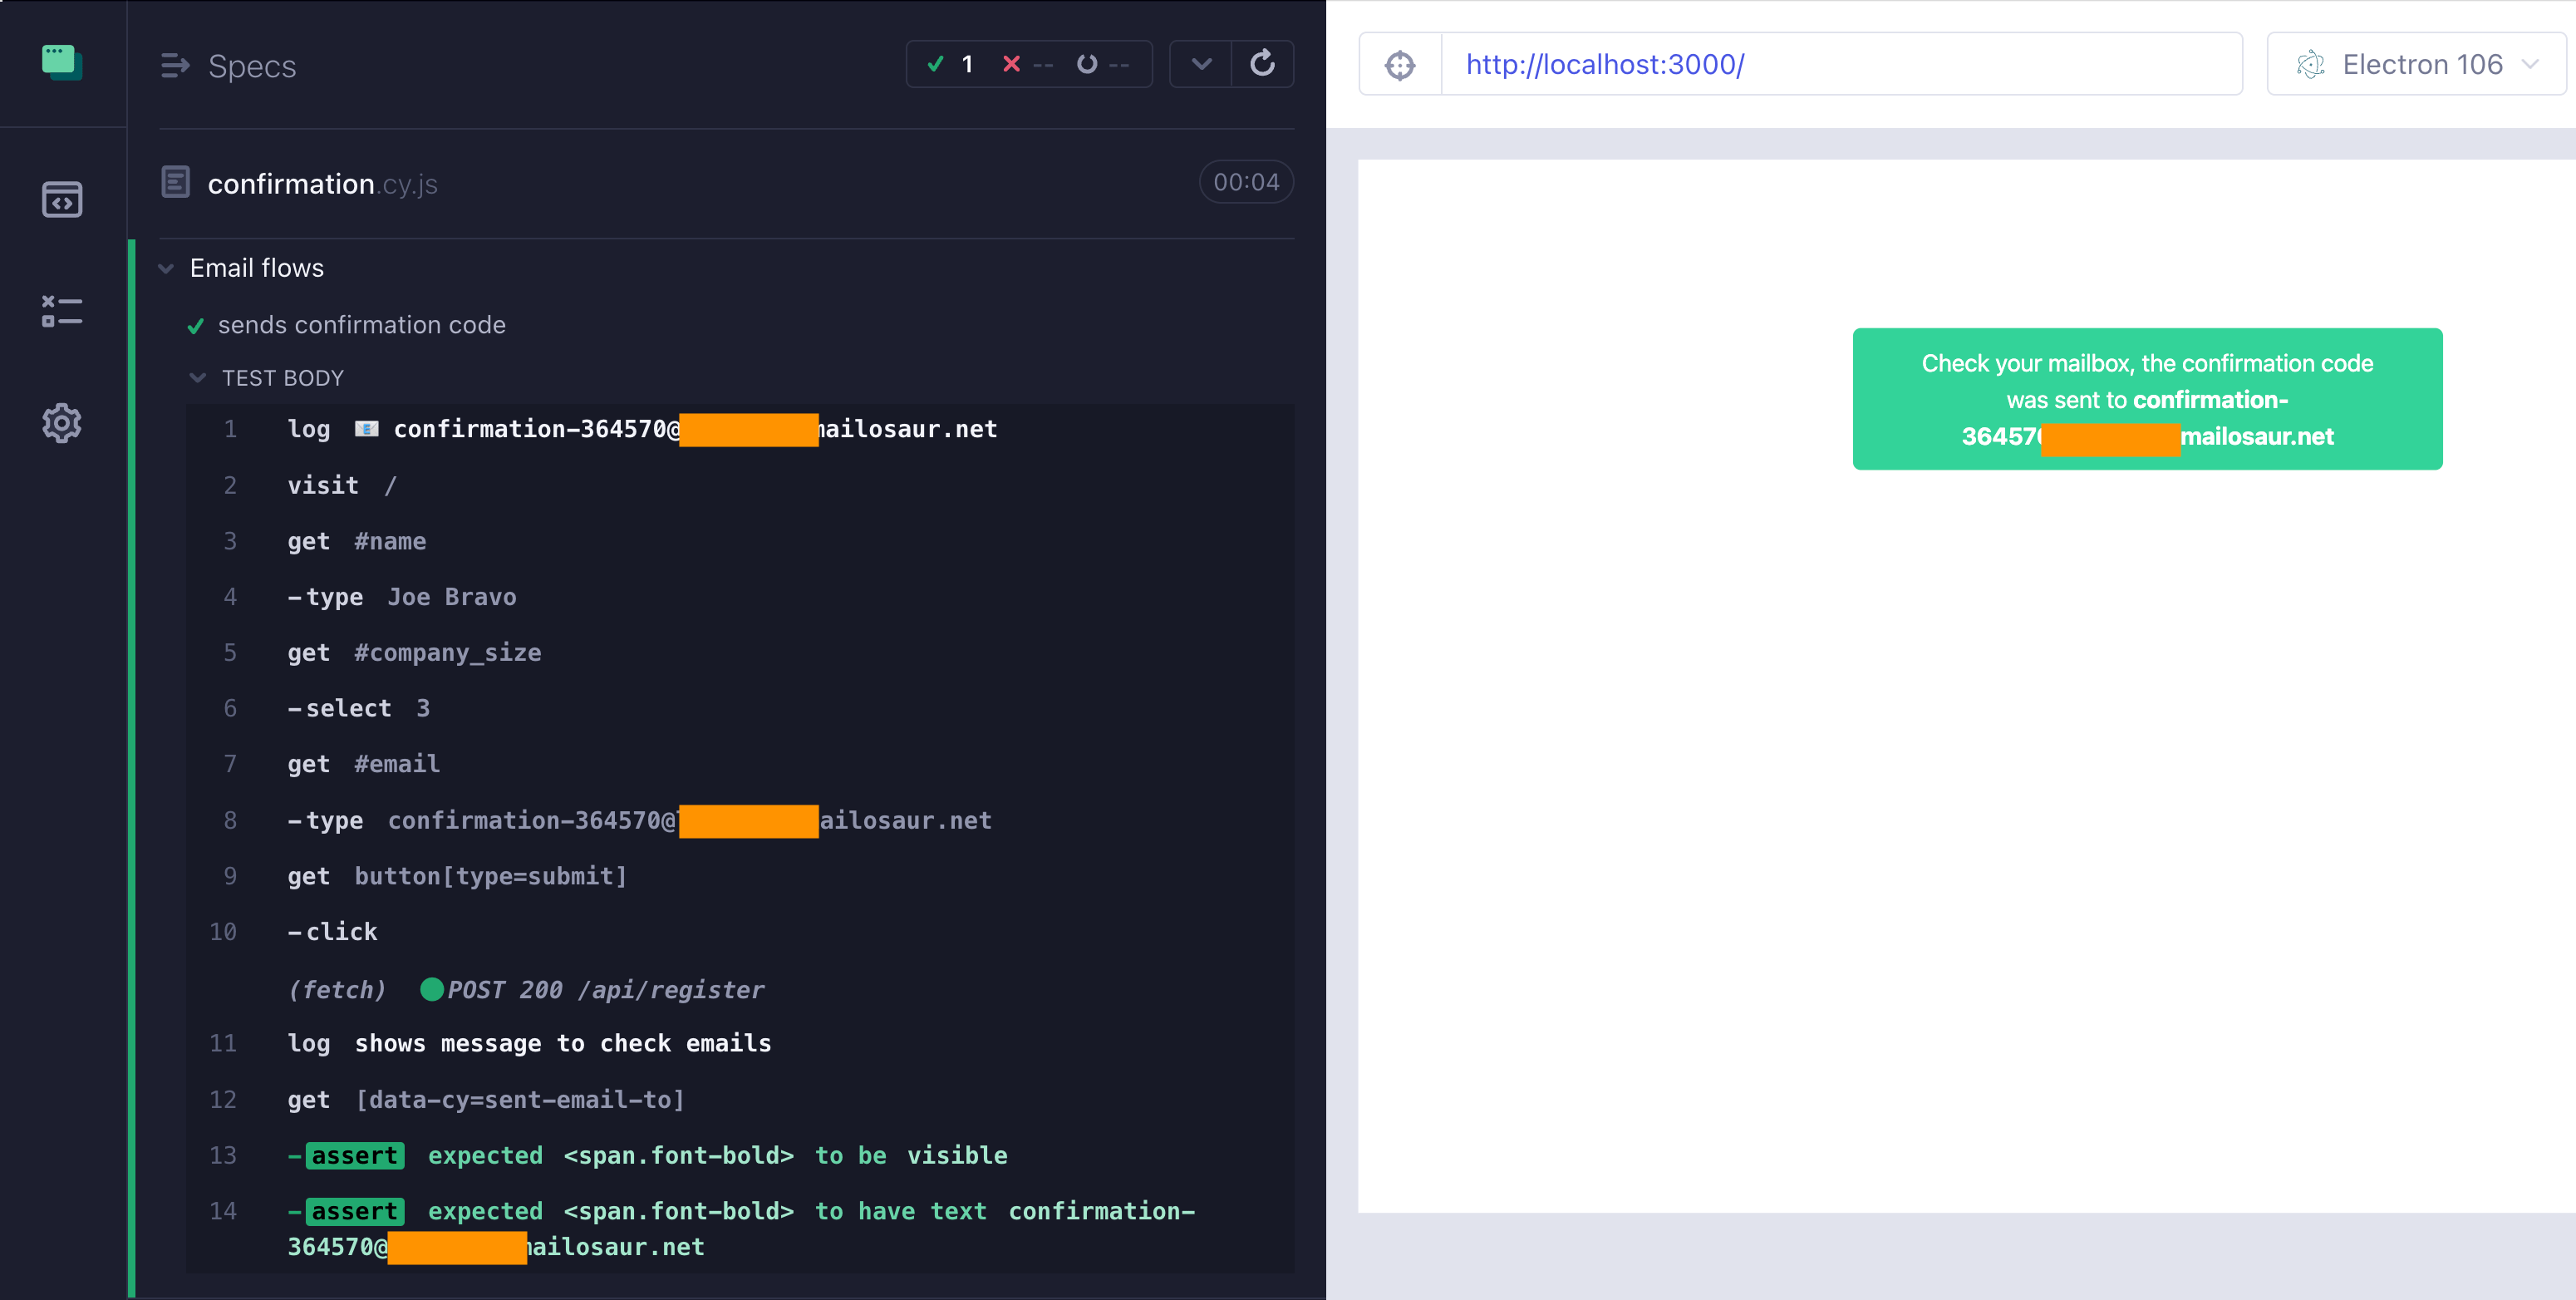
We can almost immediately find the delivered email in Mailosaur web application.
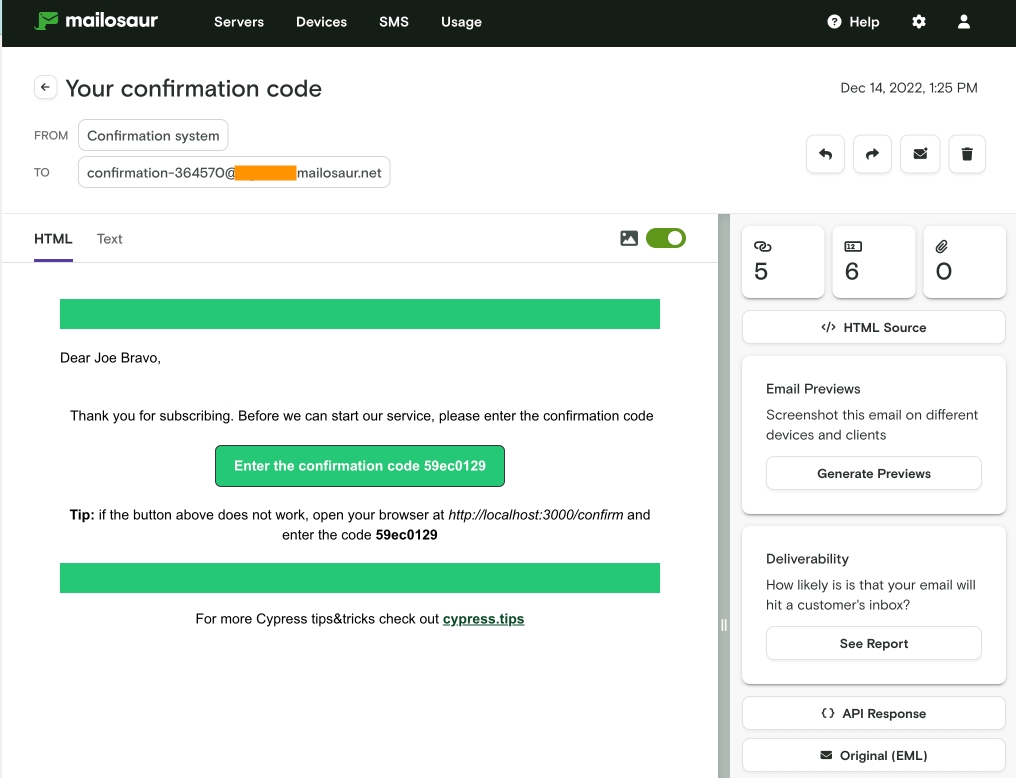
Fetching the email from Mailosaur
Let's grab the email from Mailosaur inbox. The CYPRESS_MAILOSAUR_API_KEY API key is read by the cypress-mailosaur plugin and we can simply call its custom command to give us the last email sent to that random email the test used.
1 | cy.mailosaurGetMessage(serverId, { |
We are not interested in the raw text of the email, we want to see the HTML version, just like the user would view the email in the browser. So once we get the HTML text, we can write it into the Document object using cy.document().invoke('write', ...) commands.
1 | cy.mailosaurGetMessage(serverId, { |
Complete the test
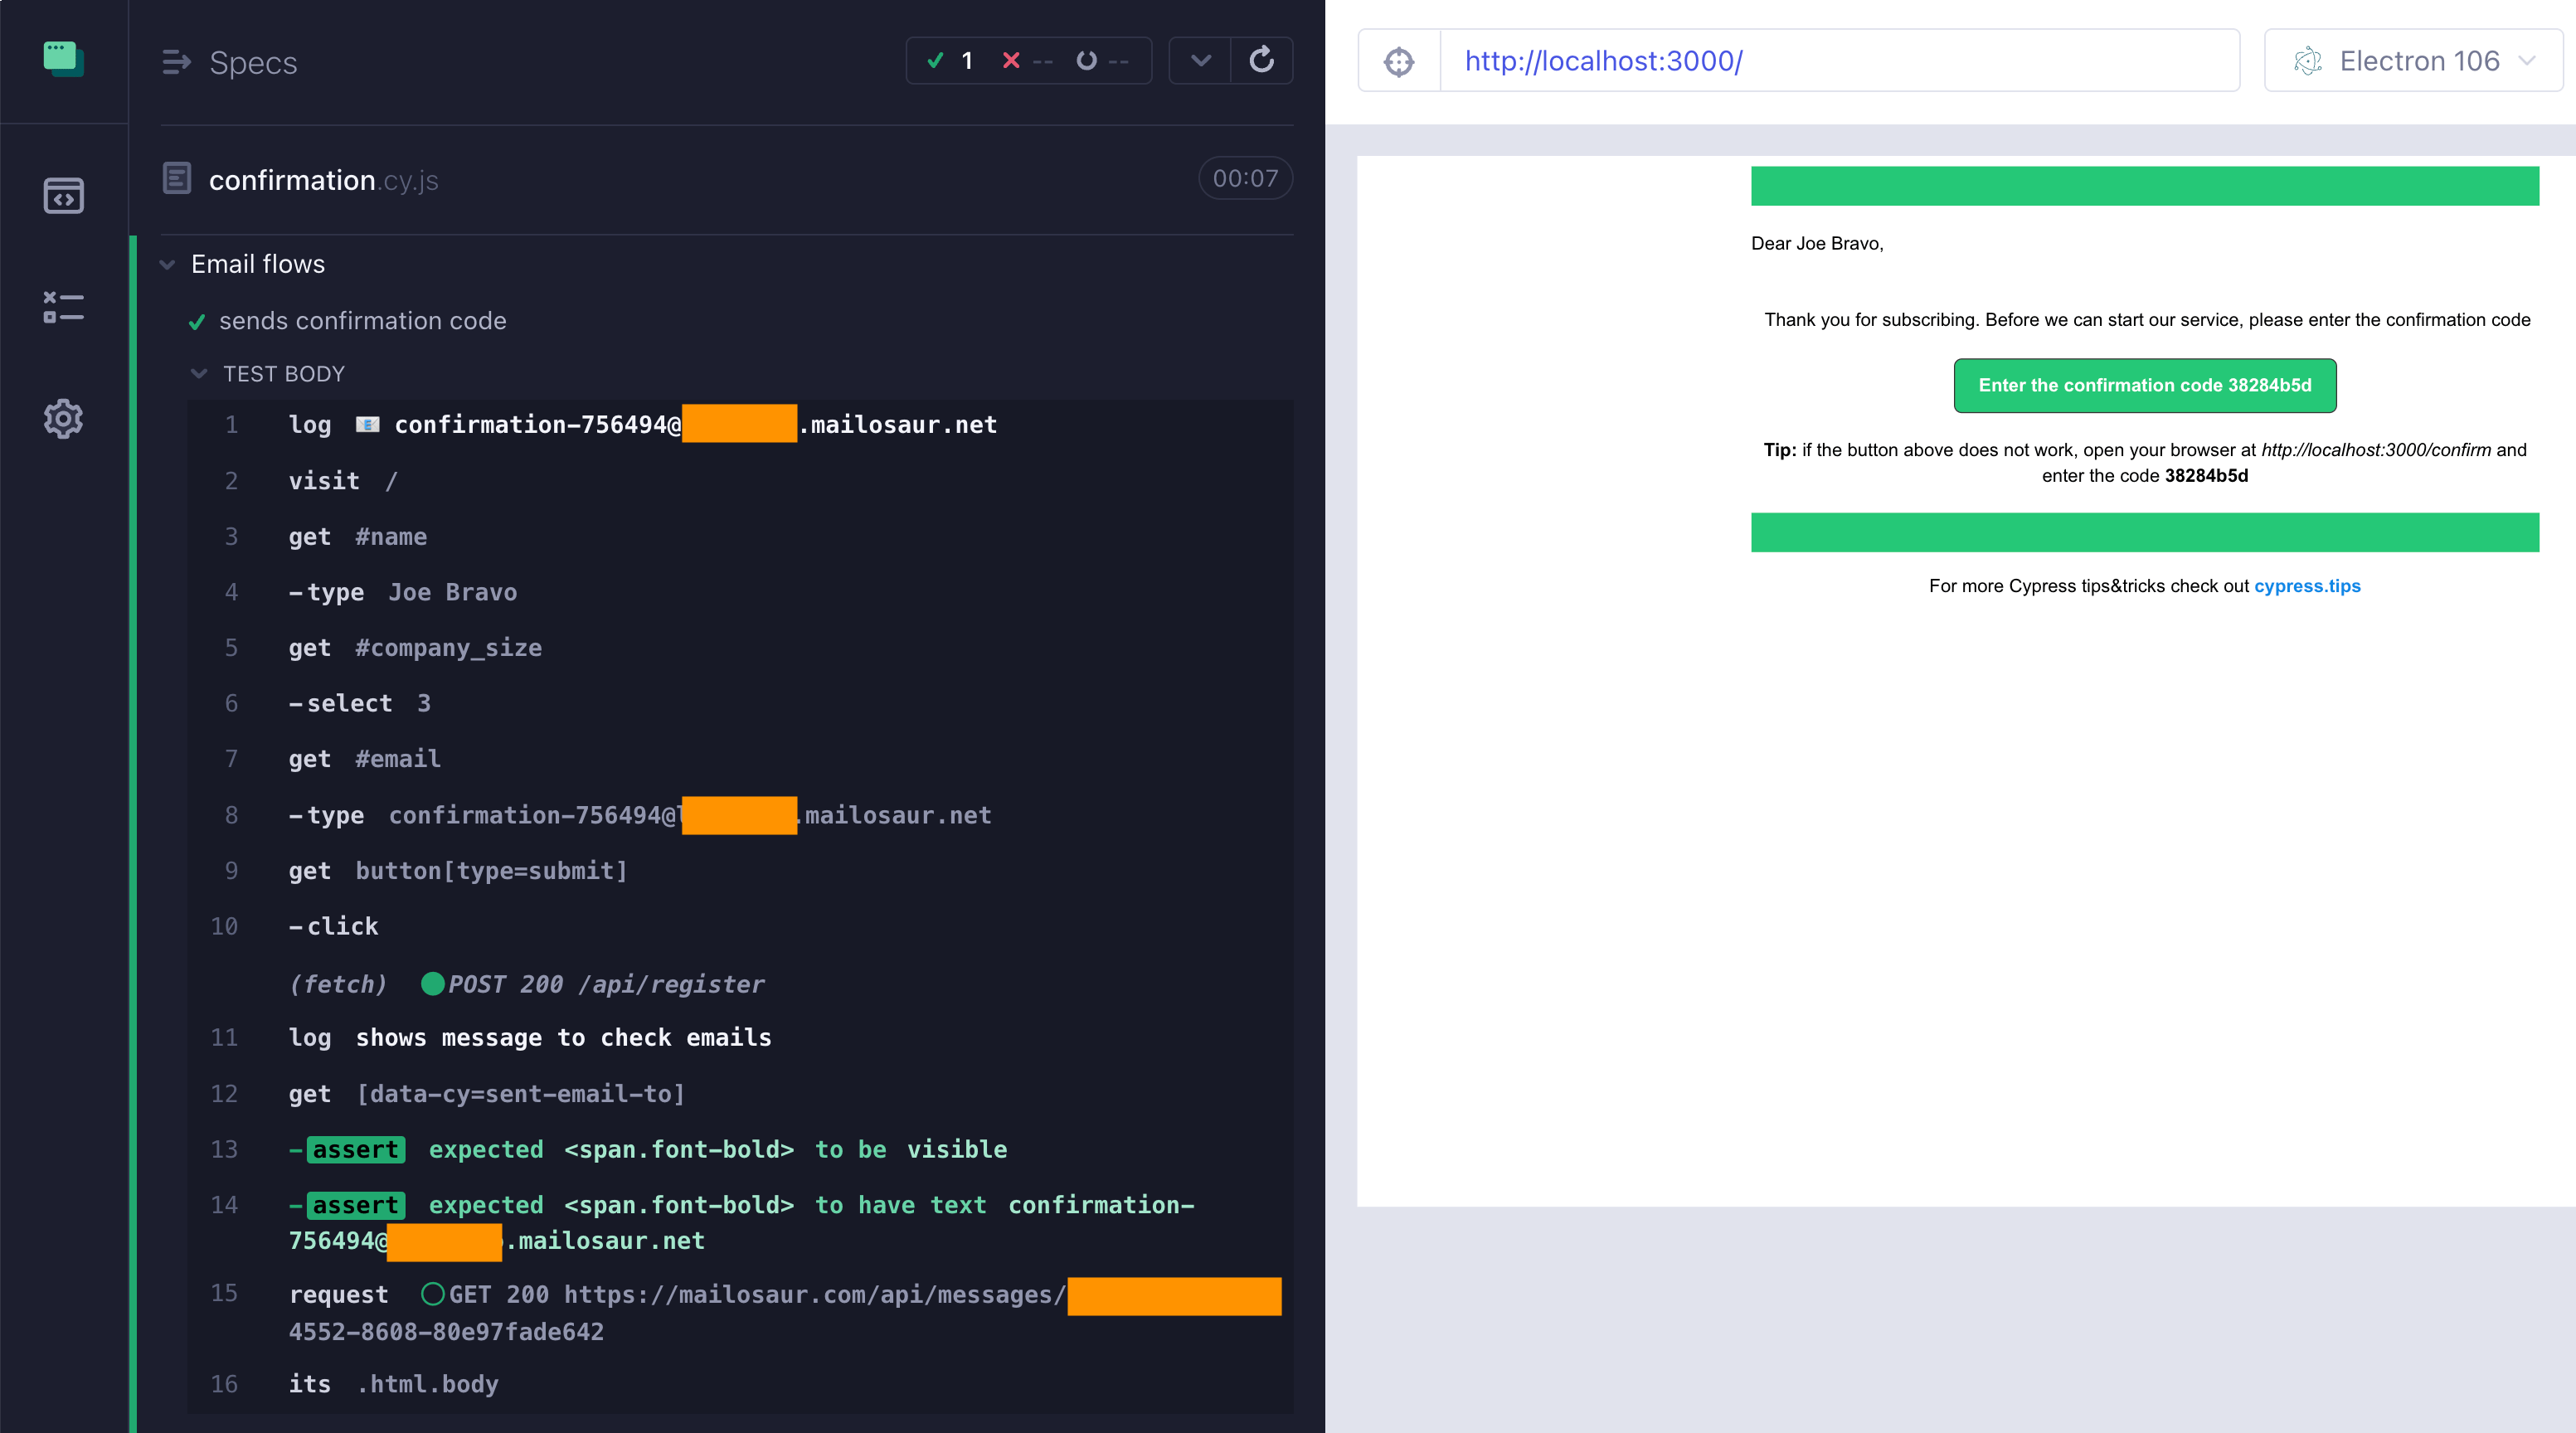
Now we can check if the email has the right name, right code, etc.
1 | cy.log('**email has the user name**') |
We can even click on the "Confirm ..." button, but first let's ensure it does not open the new browser window.
1 | cy.get('@codeLink') |
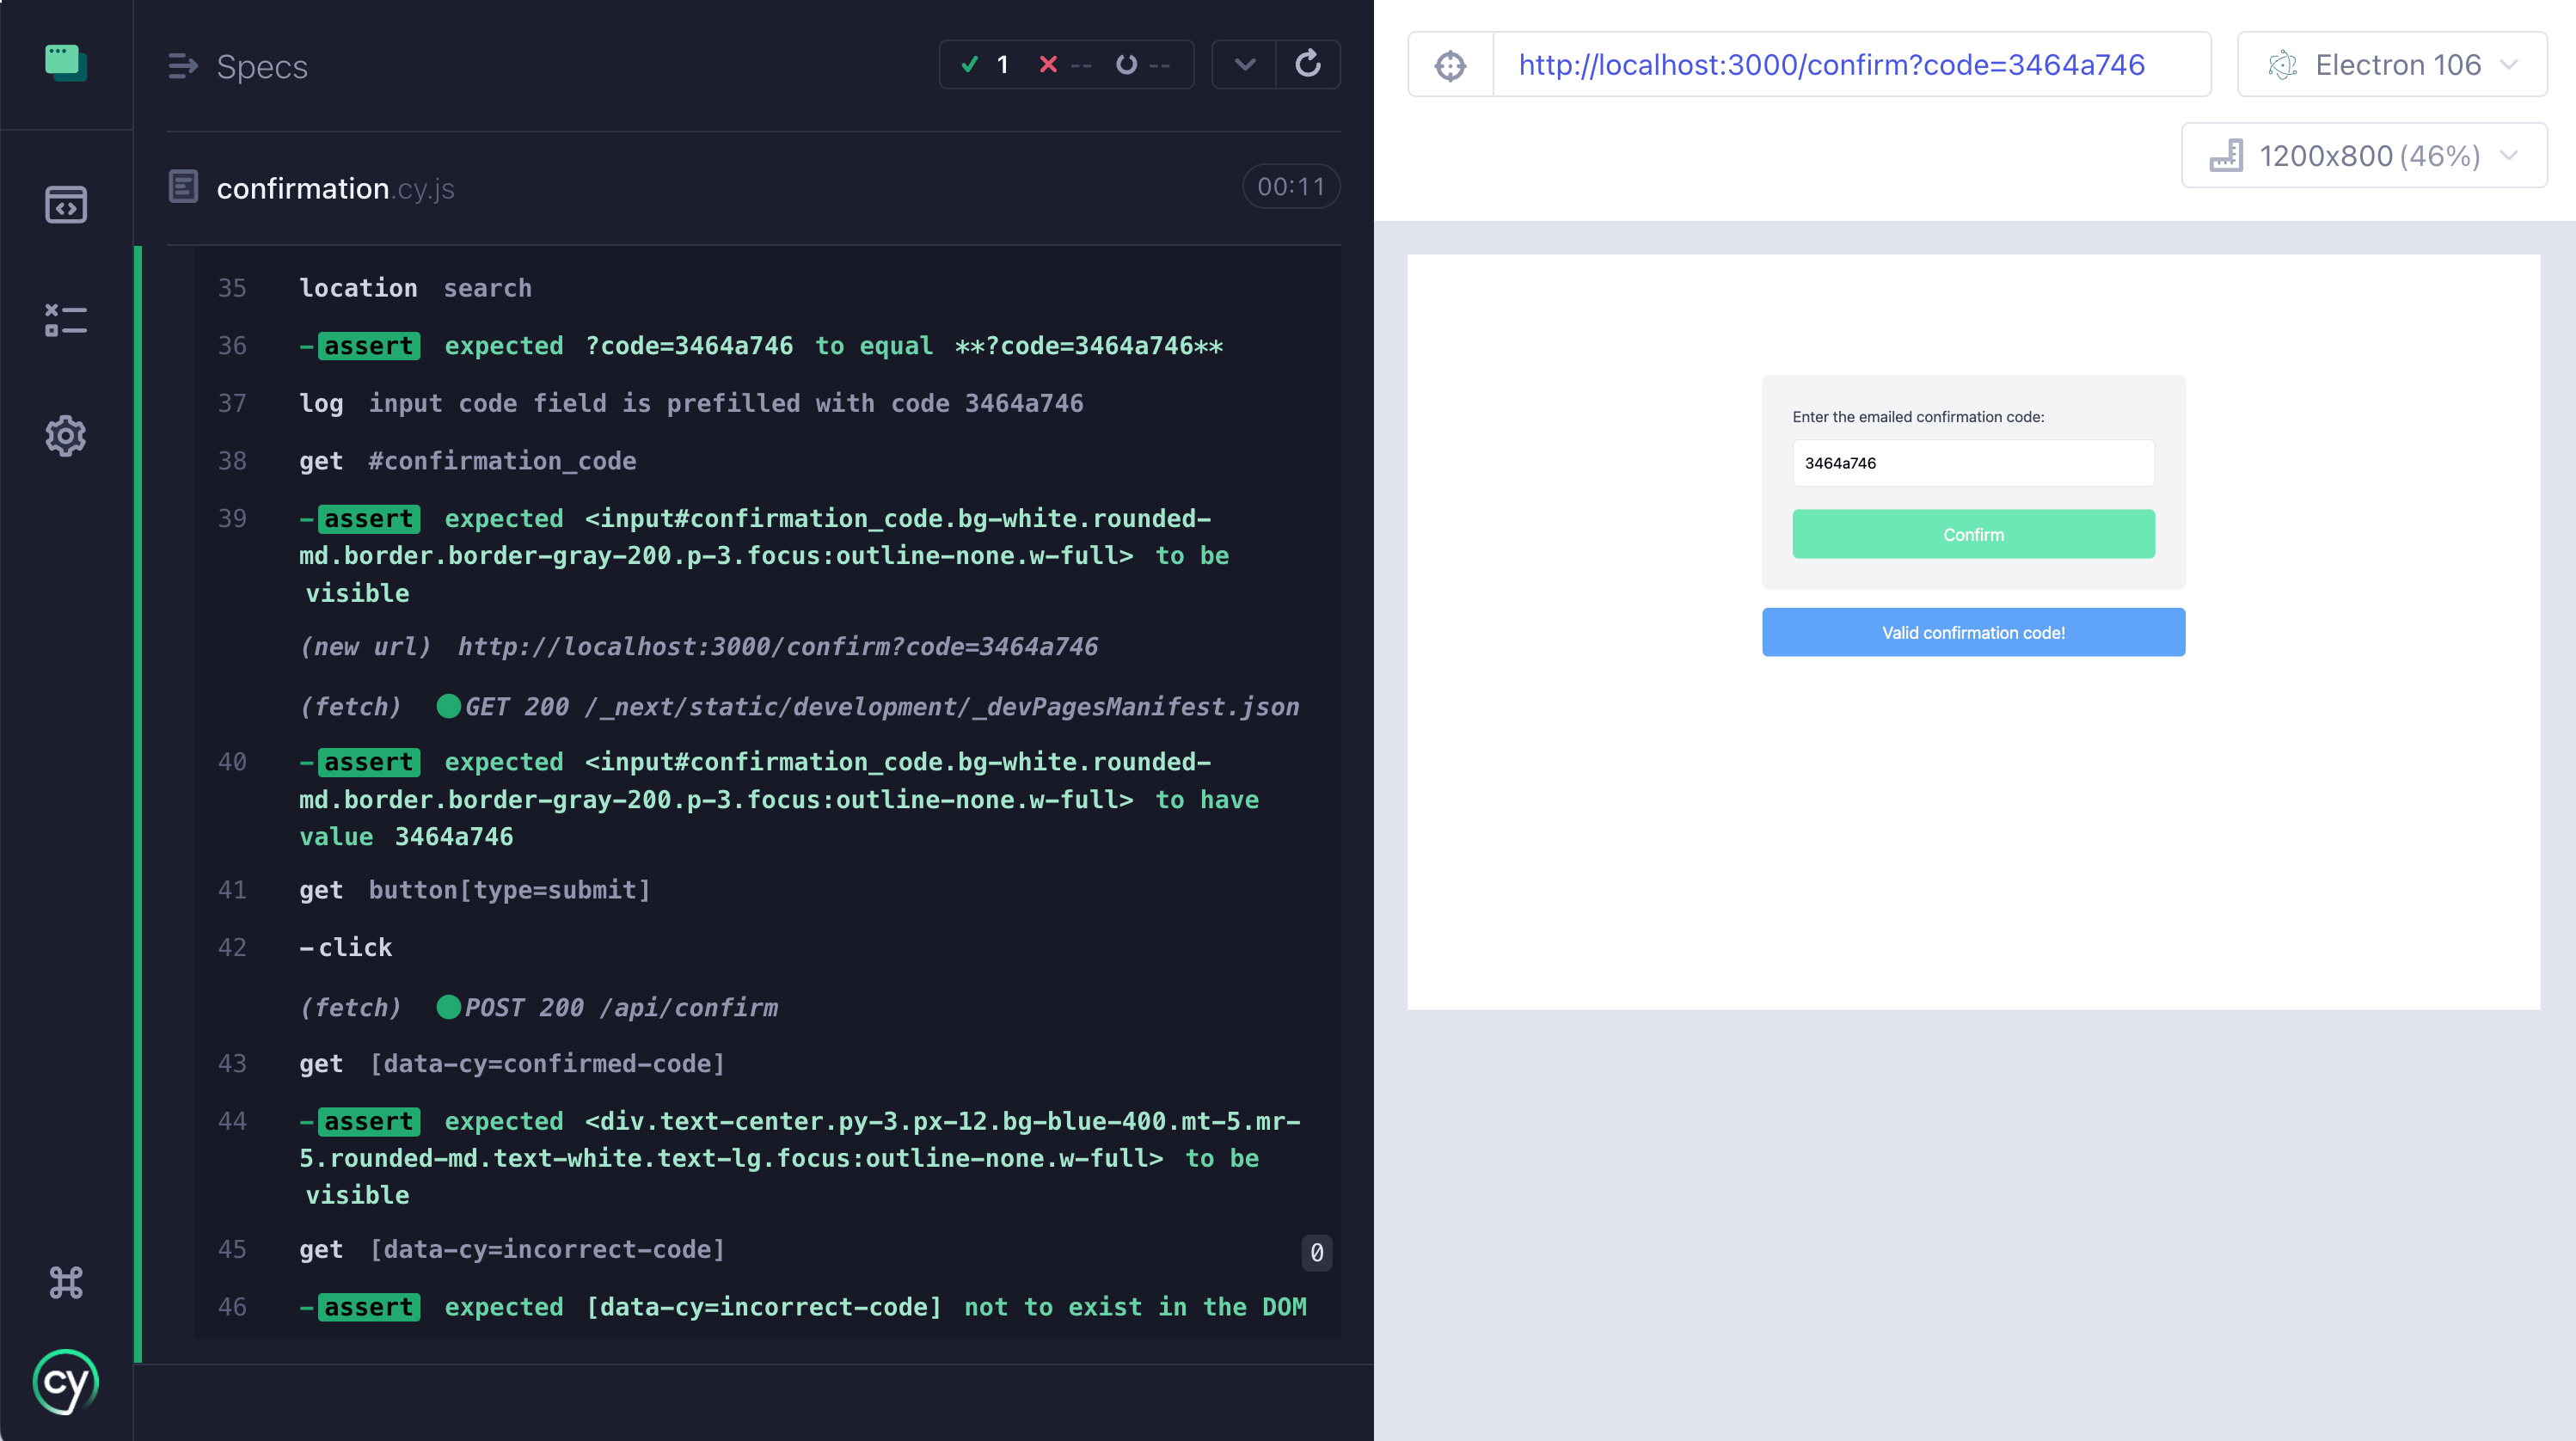
The navigation takes us back to our localhost:3000/confirm?code=... URL
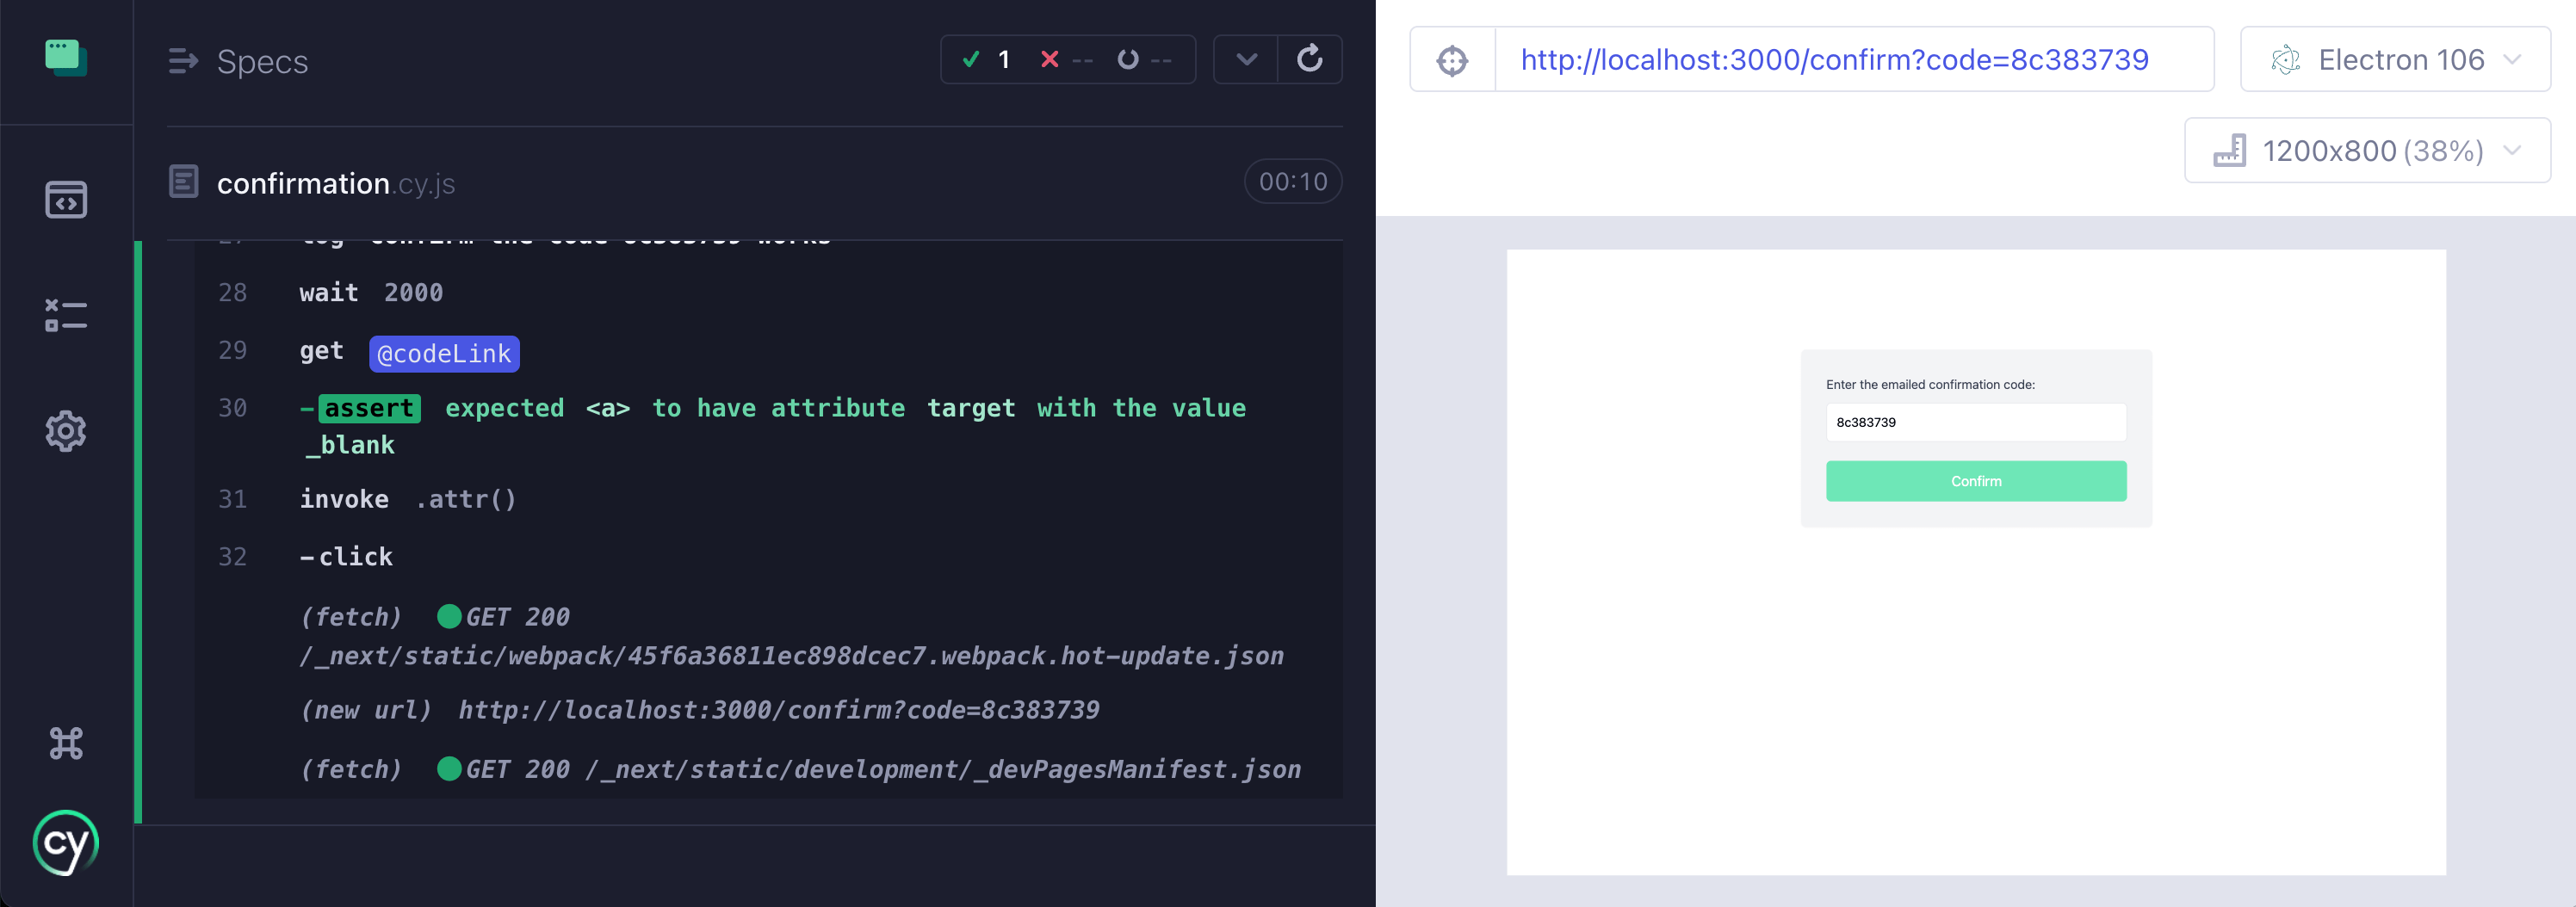
Let's confirm the URL and the code work.
1 | // confirm the URL changed back to our web app |
Beautiful, the email confirmation flow works.
Please do not use gmail-tester
I also looked at gmail-tester plugin for accessing emails sent to a Gmail inbox. When I say "I looked", I mean I wasted almost an hour of my life trying to configure some weird OAuth way of accessing the inbox using tokens, credentials, secrets, and other Google crap. Please save yourself and use a dedicated email testing inbox. If you don't want to use cypress-mailosaur, try any other dedicated services through their Cypress email plugins.
See also
- 🚨 read the blog post Minimize Mailosaur Use and be careful with Mailosaur pricing
- 💻 presentation slides Full End-to-End Testing for Your HTML Email Workflows
- 📝 blog post Testing email flows with Mailosaur by Filip Hric
- 📝 blog post Testing HTML Emails using Cypress
- 📝 blog post Test emails effortlessly with Cypress, Mailosaur and cy-spok by Murat K Ozcan