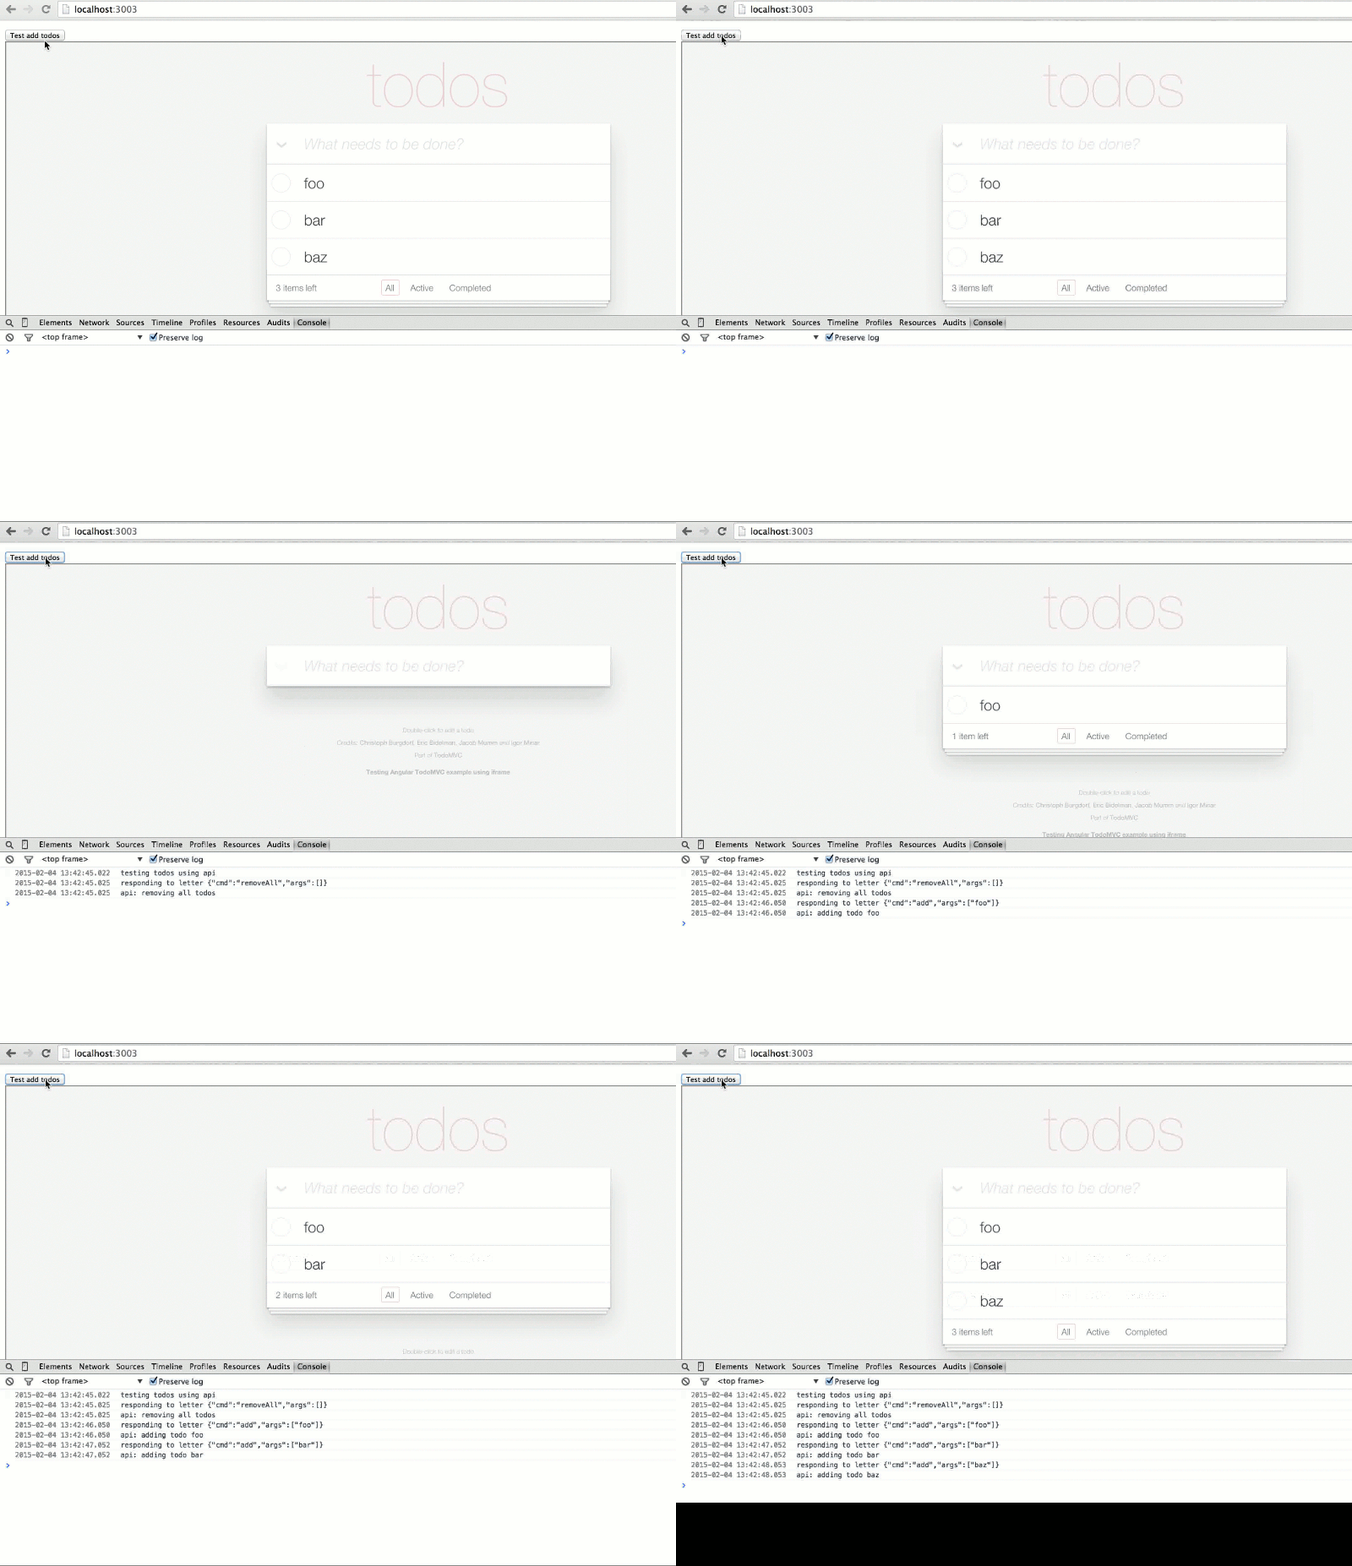
Demo, source, iframe-api.
Testing is hard. Unit testing is easier that feature testing. Feature testing is hard because it drives the application through the DOM elements. The DOM elements change often due to style updates, and they are usually changed by people more proficient in CSS and visual design than JavaScript programming.
Take a look at the TodoMVC angularjs example tastejs/todomvc. The test folder contains many controller unit tests, while there is a single directive unit test (focus directive). There are no end to end feature tests.
We write end to end feature tests using CasperJS. Other people might prefer Protractor, but the principle is the same: the entire application is loaded in a browser and then driven via DOM elements and events. In our case CasperJS is headless browser, thus we do not even see the website during testing, making it harder to diagnose problems.
I am rethinking this approach to the application design and testing. The new way relies on being able to drive the application at the model level, and communicate with the website using iframe api. Then we can run the end to end test sequences, observe the results and decouple feature tests from particular UI implementation.
I cloned the AngularJS TodoMVC application example and placed it in this repo. The next sections described what changes I have made to this example. You can see the finished example here. Click "Test all todos" button and watch the new todo items appear one by one.
Decouple model from the UI
First change we have to do to our application is to decouple the model from the DOM. In a typical angularjs example, such as TodoMVC example, the controller keeps both the data (list of todo items), shows its representation on the page via data binding, AND handles user events, such as clicking on the button to add a new todo. Look at the way it is implemented in TodoMVC/todoCtrl.js:
1 | var todos = $scope.todos = store.todos; |
The $scope.addTodo is executed whenever the user clicks on a button in the HTML template
1 | <form id="todo-form" ng-submit="addTodo()"> |
Notice how adding a new todo depends on having the property $scope.newTodo. Anyone who
wants to test adding a new todo feature has to look through the code to see that newTodo has to be set
before calling addTodo - classic object-oriented complexity.
Let us separate the model ($scope.todos), from the widget for entering a new todo UI information ($scope.newTodo,
the ng-click handler, the code for checking if $scope.newTodo is empty). I really likes Todd Moto's approach
described in Rethinking AngularJS Controllers that shows this approach.
First, we create a separate method on the controller which is responsible for handling the click.
1 | <form id="todo-form" ng-submit="addTodoClicked()"> |
Second, we separate the input value checking (user interface) from adding the todo (model) and resetting the input field (user interface again).
1 | // handle UI logic |
Notice how the model method $scope.addTodo returns a promise, allowing the UI method $scope.addTodoClicked
to clear the input property $scope.newTodo on successful add.
We could keep dividing the code further and move the model methods into a service for example, but for now this is enough.
Communicate with the TodoMVC example via iframe API
I have written iframe-api library to allow bidirectional promise-returning communication between the external and iframed websites. We can create an external page that will drive the TodoMVC app via external model level commands
1 |
|
The external page has no method for the iframed site to call, so it calls iframeApi() without arguments.
It will receive an API object to communicate with the iframed TodoMVC app. In the TodoMVC application,
I put the same login into the app.js file.
1 | angular.module('todomvc', []) |
The external website can now call a single method add(name); on the returned todoApi object.
In the iframe's context, the todoApi grabs the scope object via angular.element call, and calls $scope.$apply()
to drive the digest cycle after changing the model.
Test the model
In any test, we want to execute an action and then check the results. In the case of TodoMVC, we can expose the following 3 methods: add a todo, remove all, return todos. Then we can run the following test
- remove all todos
- add N todos
- get todos and make sure there are N incomplete todo items
I added removeAll and returnAll methods to the api object returned by the TodoMVC
1 | // external api |
We can execute these actions from the iframe website. I connected a test button to the following function
1 | function testAddTodos(api) { |
The communication with the iframed TodoMVC app is via promise-returning functions. If you do not feel comfortable with promises, read my blog posts about them.
Benefits and conclusions
The above approach to testing complete website has multiple advantages
- Explicit separation between the application's model logic and its user interface. The model changes less often than the interface, thus the tests will not become obsolete if someone changes list of todos to be shown with different CSS class, or moved the input text, etc.
- The test runs visually and can be controlled step by step. For example, we can pause after each command.
I wrote a small ES6 promise-returning delay function that sleeps for 1 second, then resolves the promise
1 | function delay() { |
I inserted the delay() calls between the steps
1 | api.removeAll() |
The above code is very user-friendly, and the result is simple to see

- The test runs inside any real browser, as opposed to the headless PhantomJS.
- The external test driver can still be automated to run inside PhantomJS / CasperJS.
- Other testing tools iframe website under test, but only drive the application through the DOM elements.